PlayStation 4 and Blue Light of Death (BLoD). It’s not what you want to hear.
When BLoD happens, you’re stuck with a dead PS4 (temporarily) and unable to game. And it can happen due to multiple reasons, including hardware or software issues.
So, can you fix it? Or do you need to take it to the support center?
Let’s find out in our guide for how to fix the PS4 Blue Light of Death.
What is Blue Light of Death on PS4?
Blue Light of Death is a common PS4 issue due to video or audio signal issues. If your PS4 cannot send video or audio to your connected display (TV or monitor), it’ll start showing the BLoD.
When Blue Light of Death takes place, you cannot play your favorite PS4 games.
However, it may not be the only reason that it can happen. Let’s learn about the other reasons for which BLoD takes place.
Reasons for the Blue Light of Death on PS4
There are many reasons the Blue Light of Death happens on PS4. These reasons include the following:
- The HDMI port is either dirt or damaged, leading to no display on the console.
- The HDMI cable is not working as intended. It can be a defective cable.
- The PS4’s hard drive has been corrupted or is no longer working.
- The TV or monitor you use with your PS4 is incompatible and shows no display.
- The PS4 power supply has gone faulty.
- The PS4 software glitched, which led to no display and BLoD.
- The TV is not set to the correct resolution, leading to resolution issues and making PS4 show the dreaded BLoD.
How to Fix Blue Light of Death on PS4
In this section, we’ll look at the methods you can use to fix PS4’s blue light of death.
➡️ Reboot PS4
Simply restarting your PS4 can solve the blue light of death. This happens because when you restart your PS4, it resets the software, along with any software-based bugs.
You can restart your PS4 by using your PS4 controller or pressing the Power button.
If your console is not rebooting, stop power by removing the wall outlet or the power strip. Once you do that, wait at least 60 seconds before you plug in your console.
➡️ Check the HDMI Ports (TV and PS4) and HDMI Cable
As the Blue Light of Death occurs due to no video or audio display, you must check the HDMI cable connecting your PS4 and TV/Monitor. Also, it’s best to try out another HDMI cable to single out the issue if it is due to a defective HDMI cable.
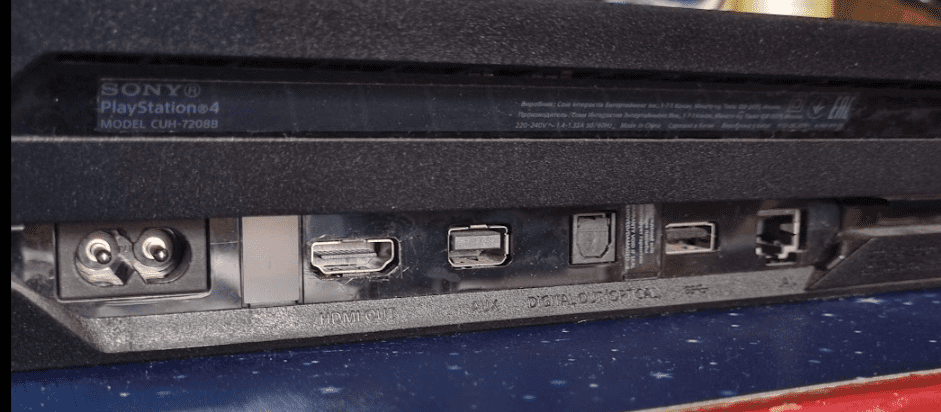
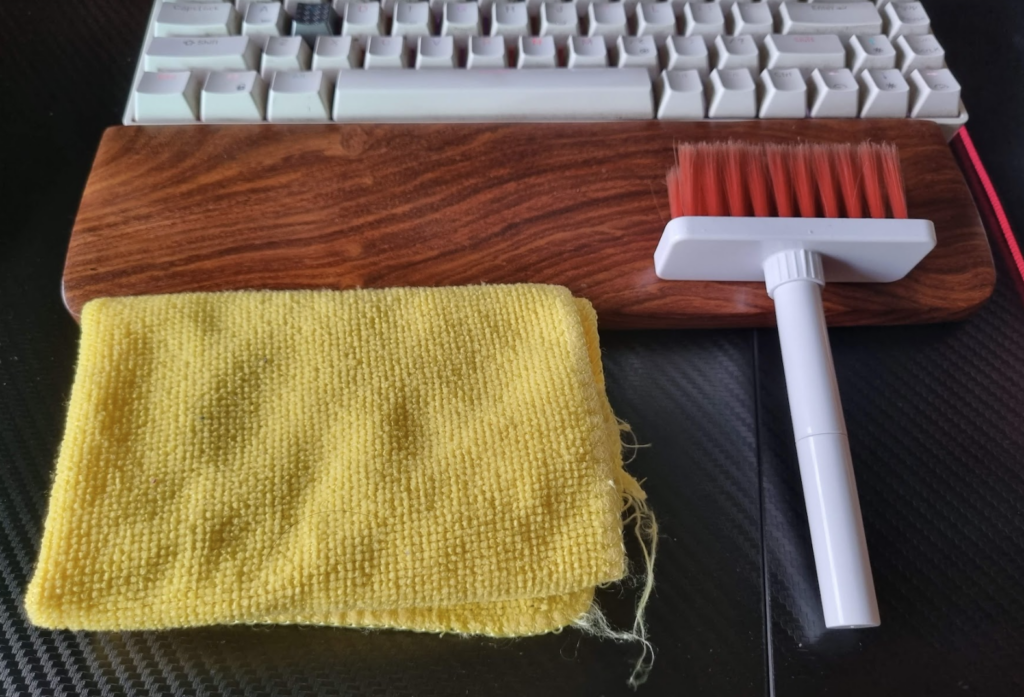
Look for any cable damages, including the connector. You also need to check the HDMI ports on your TV and PS4. When checking the ports, look for any pin damage or dirt. Please clean it up with a brush or microfiber cloth.
Once you’ve singled out that it’s an issue with the HDMI port, you can check out our post on how to fix the PS4 HDMI port.
➡️ Discharge PS4
You can also try to discharge your PS4. The discharge method can help you remove the BLoD. The exact steps that you need to follow include:
- Press and hold the PS4’s Power button until it makes two beeps.
- Unplug all the cables.
- Now, press and hold the PS4’s Power button (again) for 7 seconds.
- Reconnect all the cables to PS4.
- Turn it on by pressing the PS4 Power button once.
If you’re lucky, you should see the white light of “relief”, as it means the problem of BLoD is fixed. If not, try the other methods.
➡️ Troubleshoot in Safe Mode
PS4’s Safe Mode is a reliable way to troubleshoot your console. All you need to do is boot into Safe Mode and try the available troubleshooting options.
You must first turn OFF your PS4 to boot into the Safe Mode. Once done, press and hold the Power button until you hear two beeps. This means your PS4 has now booted into the Safe Mode.
Note: To use Safe Mode, you’ll need to connect your PS4 controller using a USB cable.
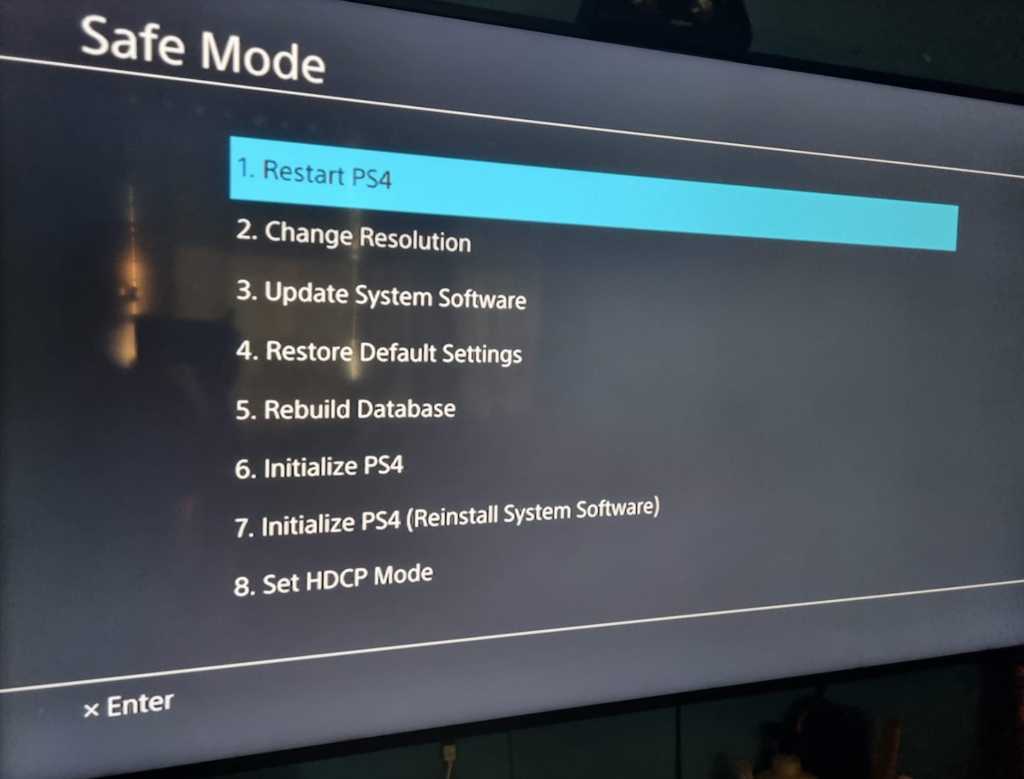
As you can see, you can do a lot of things here! I suggest trying out the following:
- Restart your PS4 — Option 1 → This restarts your PS4 and aims to return it to working condition. If your PS4 has any software-related bug, then the option is helpful as it can fix the issue.
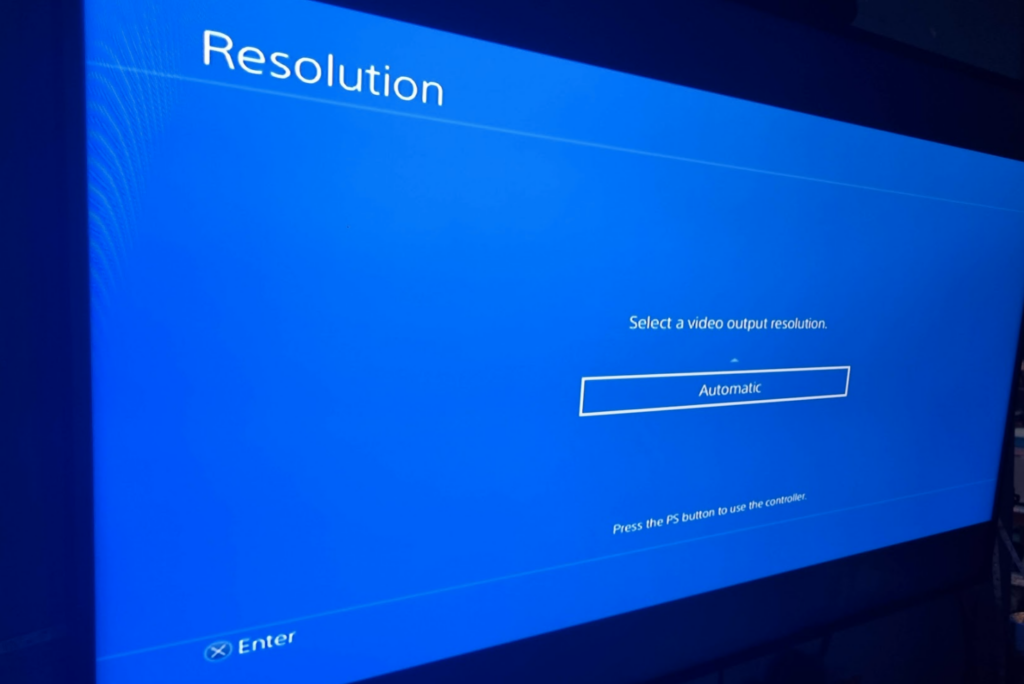
- Change Resolution — Option 2 → If your PS4 and TV resolutions don’t agree, then the Change Resolution option can help you resolve it. Once you press X on your controller, you can choose a resolution such as 720p, 1080i, 1080p, or 4K.
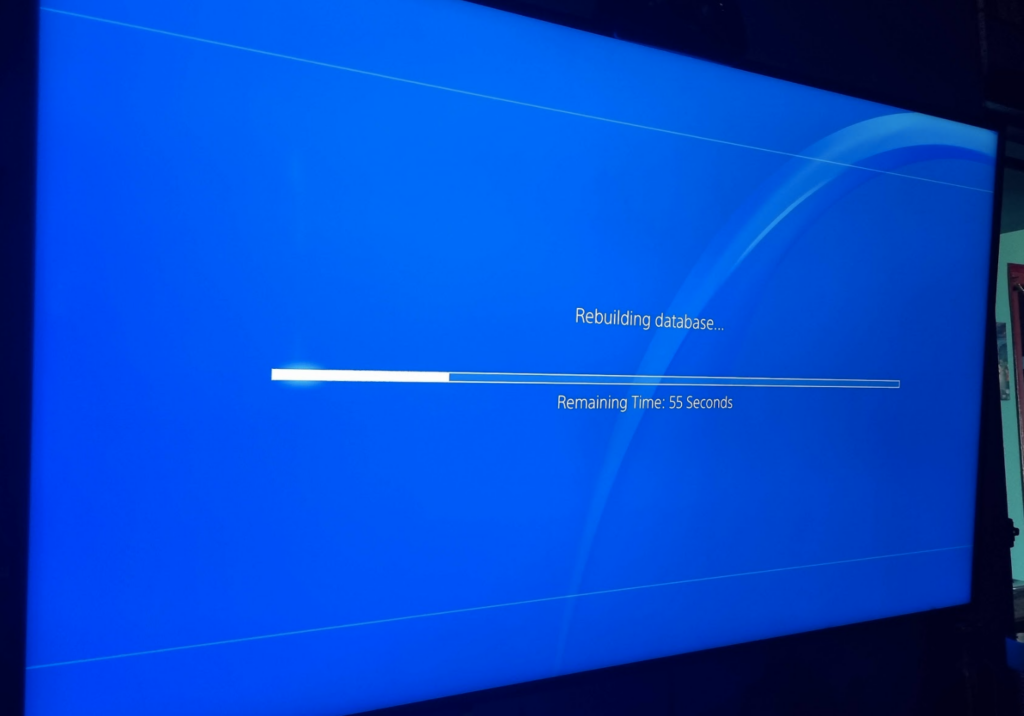
- Rebuild Database — Option 3 → The Rebuild database option lets you rebuild the internal game database, which can get corrupt due to power cuts, software issues, or data corruption.
➡️ Factory Reset your PS4
In Safe Mode, you also get the option to factory reset your PS4. When you perform a factory reset, you initialize the PS4’s software to factory settings. Currently, you get two options to factory reset:
- Initialize PS4 → This option lets you do a factory reset but doesn’t delete any of your games
- Initialize PS4 (Reinstall System Software) → Do a complete system software reinstall, including deleting any games and associated data, as well as saved games.
You can choose any of the options. However, it is recommended to go with the Initialize PS4 option as it preserves your games. Only select to reinstall the system software if you have backed up your games.
➡️ Check Power Supply
Checking the power supply is another way to know the root cause of the issue. Here, you need to check the plug socket and the PS4’s power supply.
Start with the plug socket. To rule out a broken power socket, plug your PS4 separately. If your PS4 works fine, you know the plug socket was the issue. If the problem persists, you can try troubleshooting your PS4’s power supply.
However, checking the power supply is tricky. You’ll need to take the power supply from the PS4’s casing and use two prong power cords to test it. The whole process is slightly complex, so we suggest you check out this post, which discusses it in detail.
➡️ Check the PS4’s Hard Drive
The next PS4 internal component that you can check is the hard drive. It’s rare for a PS4’s hard drive to go bad, but it can go bad; it can throw your PS4 into an array of problems, including the BLoD.
The first and most significant challenge is removing the PS4 hard drive. It requires carefully following the steps mentioned below:
- Make a solid grip over your PS4 by holding it from both sides.
- Now, slide the hard drive cover with your thumbs.
- You can now see the hard drive compartment. Lift it, and you’ll find the 6.5 mm screw.
- Use a screwdriver to unscrew it.
- Next, remove the hard drive bracket from the enclosure.
- It’ll reveal more screws, 7.2mm to be exact. Unscrew them from both the left and right sides.
- Finally, take out the hard drive.
To test, you can connect the hard drive to a computer. You can use S.M.A.R.T analysis (Self-Monitoring, Analysis, and Reporting Technology) or utility programs such as CryStalDiskInfo or HHDScan.
➡️ Check and Update PS4 and TV Firmware
Outdated firmware can also hamper the normal functioning of the console. That’s because firmware dictates how the hardware interacts with the software. And, if you’re using an older firmware, you’re exposing yourself to many bugs that can cause issues such as the Blue Light of Death.
That’s why you must update your PS4 and TV firmware.
To update your PS4 firmware, open Safe Mode and choose “Update System Software” (Option 3).
For your TV, it’s best to check the official documentation on how to update its firmware.
➡️ Initiate Firmware Reset by Changing CMOS battery
If you cannot get into Safe Mode, you can change the CMOS battery to do a firmware reset.
To change the CMOS battery, follow the exact steps mentioned below:
- Turn off the console and remove all the connected cables.
- Open the PS4 case.
- You’ll see a coin-sized battery on the motherboard as soon as you open it. Remove it using a screwdriver.
- Get yourself a new CR2032 CMOS battery and wait for at least 5-10 minutes.
- Insert the CMOS battery and close the case.
- Reconnect all the cables and wait another 10 minutes before powering it ON.
➡️ Take Professional Help
You tried everything mentioned in our guide, but nothing worked. Now what?
Well, you can get professional help. If your console is under warranty, you can contact official Sony support or go to your local Sony support center to get it repaired. If not, you can take your PS4 to a local repair shop.
Conclusion
Fixing PS4’s Blue Light of Death requires patience. You can get your console working by restarting it, or you may need to test your power supply, which requires using power cords, screwdrivers, and technical skills.
So, keep at it, and you can solve it. Otherwise, you can always get professional support.
What if the PS4 is stuck on a white screen instead of a blue one? In that case, you’re experiencing the White Light of Death (WLoD). Fortunately, we have a guide on how to fix the PS4 White Light of Death as well!