In the first part of Starfield’s ‘Further Into The Unknown‘ quest, I’d got Artifact Theta from the caves on Augur, the moon of Bode, in the Delta Pavonis System. The next and final part of the mission has me going to Kindi, another moon, in another planetary system. Hopefully, I’ll now be able to get my hands on Starfield’s Artifact Tau.
One of the Starborns had tried to stop me from taking the Artifact at Augur. I managed to finish him off quite easily, but the enduring mystery is that there was no body to be found, only blood. Even if the Starborn was using a cloaking device, how could his entire body disappear after being killed? The inexplicable occurrence has been nagging me since the incident.
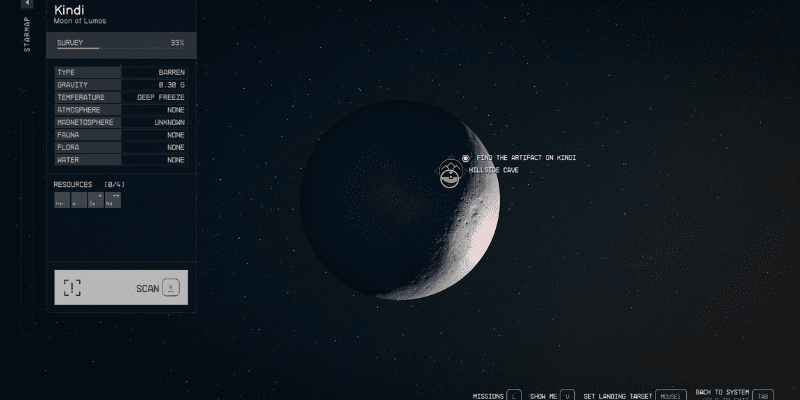
Kindi is a moon of Lumos, in the Valo system. Here begins my second and final part of the walkthrough of Starfield’s Further Into the Unknown quest.
Land Near The Hillside Cave on Kindi
To go to Kindi, you’ll have to grav-jump from Augur. The location is Hillside Cave.
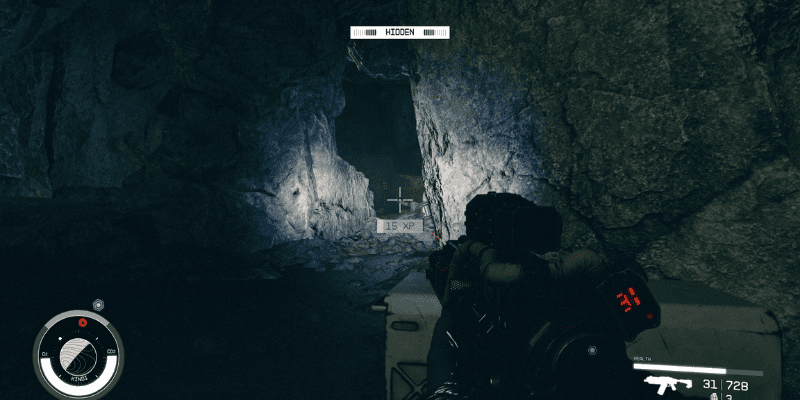
Enter The Caverns
Same as on Augur, you won’t find any enemies outside the Hillside Cave. The way to the cave entrance is not difficult to get at all (some would question the ease of finding a hole on the ground level, but that’s where Bethesda put it).
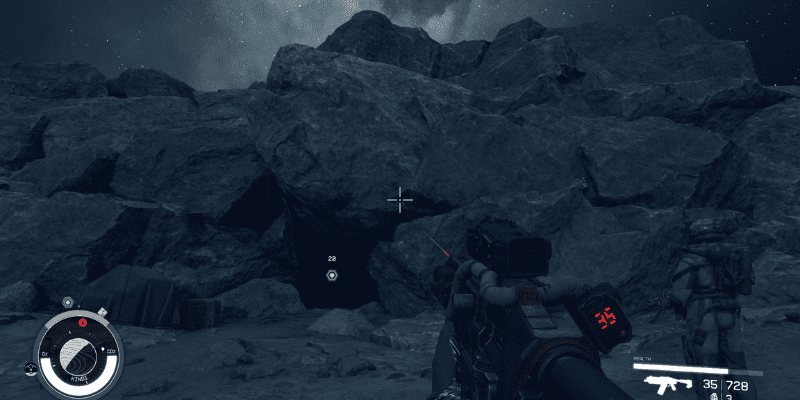
Approach the marked location directly and follow the marker to enter into the caverns.
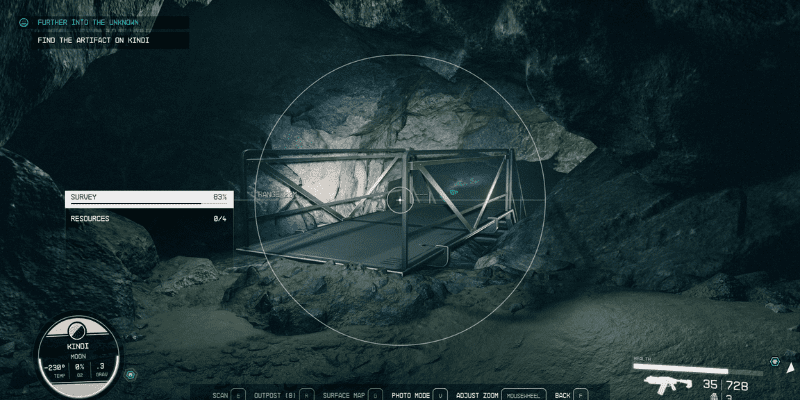
➡️ Artifical Structures!
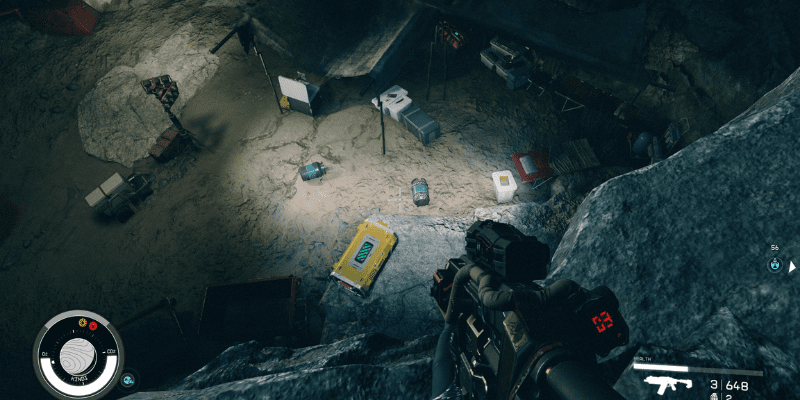
As soon as you enter the caverns, you’ll immediately see a metal staircase through which you have to descend. A staircase means humans have been here before or are still inside.
Take a few steps, and you’ll see a small deserted camp. Pull up your scanner to check the objects nearby. You will spot an ammo case, a first aid kit, and a storage box.
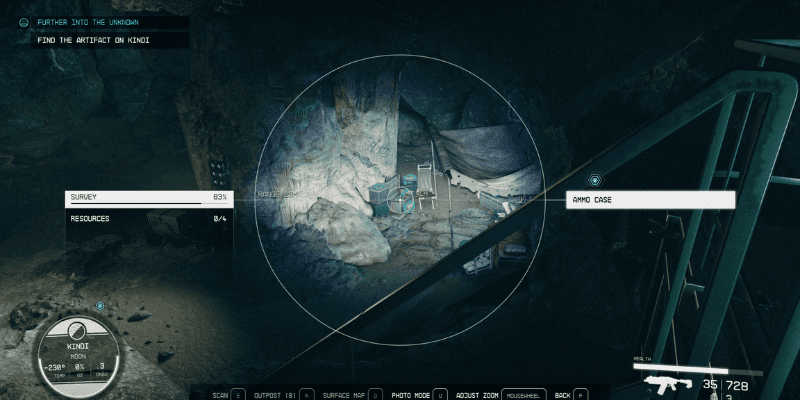
But don’t go down to check all of them, as behind that area is a turret that will start firing as soon as it sees you. That turret needs to be taken out first.
➡️ Pro Tip: Keep Your Ears Open For Turrent Sounds
When you are close to the location of a turret, you should be able to catch the ‘wee-wee’ sound of its rotation. That means you have to be careful.
Destroy the turrets behind the shelter, grab the useful items, and move ahead.
➡️ Beware of More Turrets
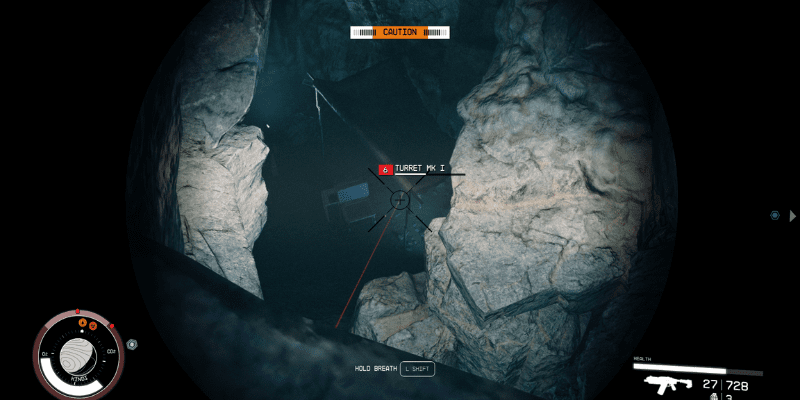
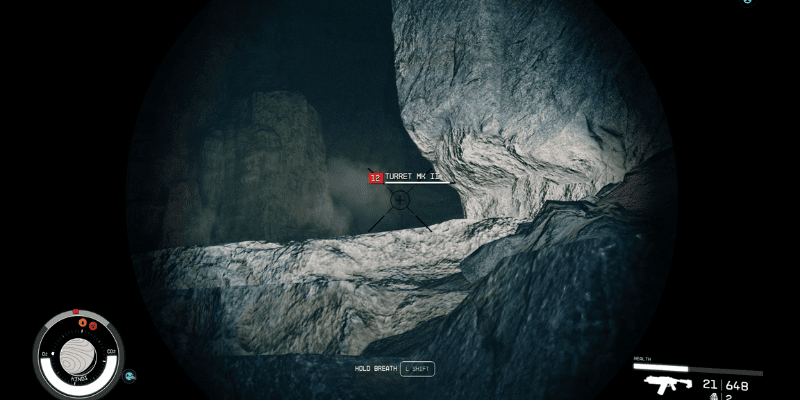
Your major concerns inside the Kindi cave are Mk-II and Mk-I turrets that have been put inside the caverns. You won’t find any humans, but certainly find evidence of death.
As I said earlier, you can sense the turrets by the sound they make when they rotate. Most of them will be near the makeshift campsites inside the cave. The turrets deal heavy damage, so you should aim to stay out of their devastating firepower.
➡️ Pro Tip: How to Spot A Turret and Destroy It With Zero Health Damage
Your scanner will help with this. When you detect a turret’s location based on the sound it makes, open up the scanner, look around and it will show you exactly where the turret is.
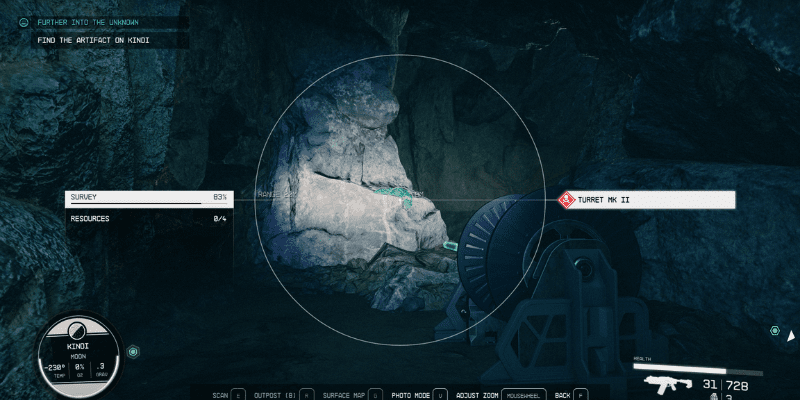
One such turret will be inside a covered structure at another deserted camp; this time, you will be on the topside. So, unless you get to the ground level, it won’t be able to shoot you. But how do you destroy it since most of it will be hidden inside the flap that covers the raised structure?
Pull the scanner up, and you will see that you can make out parts of the exposed legs of the turret.

Once you see them, start damaging them with single shots from your rifle/pistol. Since the turret camera can’t see you, the machine won’t be able to hurt you, and you will soon be able to put it out of operation with zero health damage.
➡️ Keep Destroying The Turrets
Use your scanner inside and keep destroying the turrets. Take the path shown to you, and soon you will reach the location of the artifact. But stop when the marker shows 30-32 distance because there is a clear danger that’s hidden ahead.
How To Get Artifact Tau in Starfield
As you move ahead, destroying turret after turret, you’ll have to stop for a bit. Directly in your path will be a toxic pool. Pay attention to the ground, and you would see the fumes rising up.
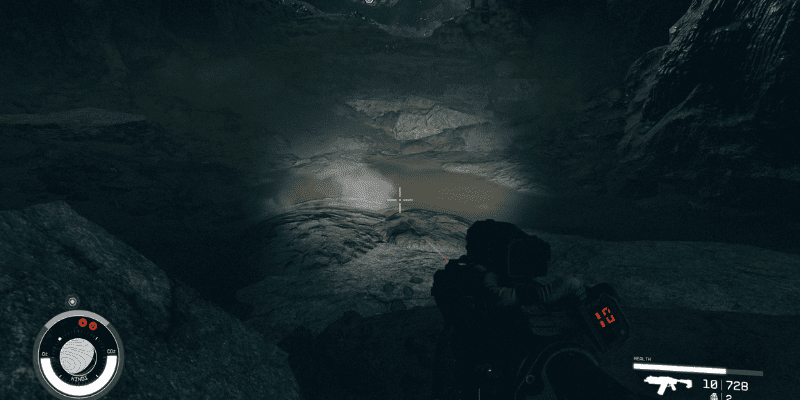
You have to be careful around this pool. The burns take some Heal Paste to heal. So why get burned at all? Use your Boost Pack to evade the pool.
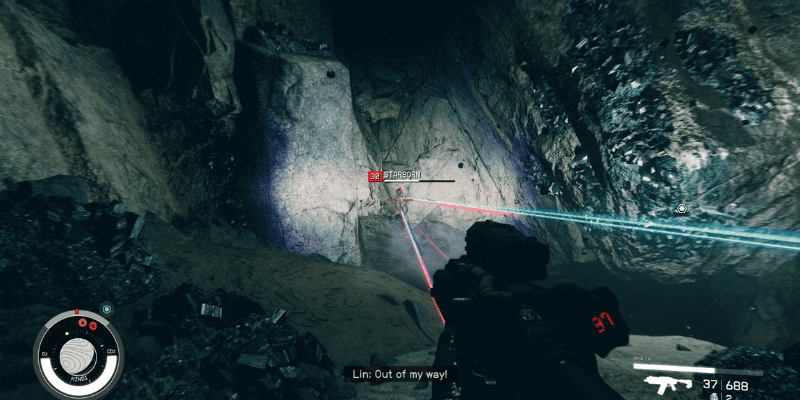
➡️ The Lone Starborn
I expected a bunch of them to appear, but this time, too (as on Augur), there was just one Starborn who tried to dissuade me from taking the artifact by shooting at me. Kill the Starborn; the body will disappear, and the pool of blood will still show.
➡️ Take Artifact Tau
Next, the final part of the mission involves you getting a hold of the thing you came to Kindi for: Artifact Tau.
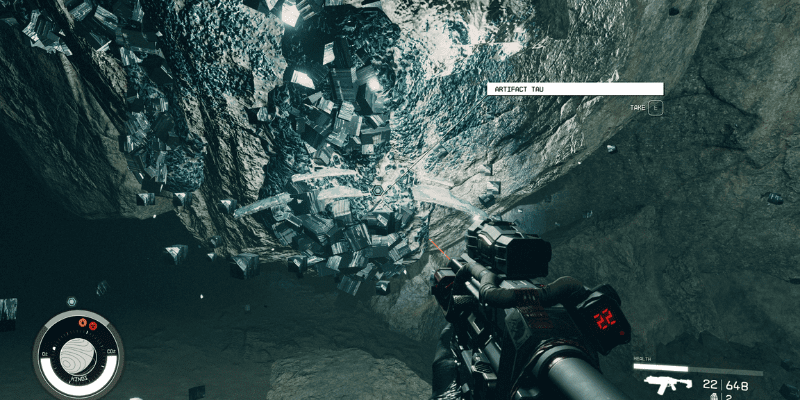
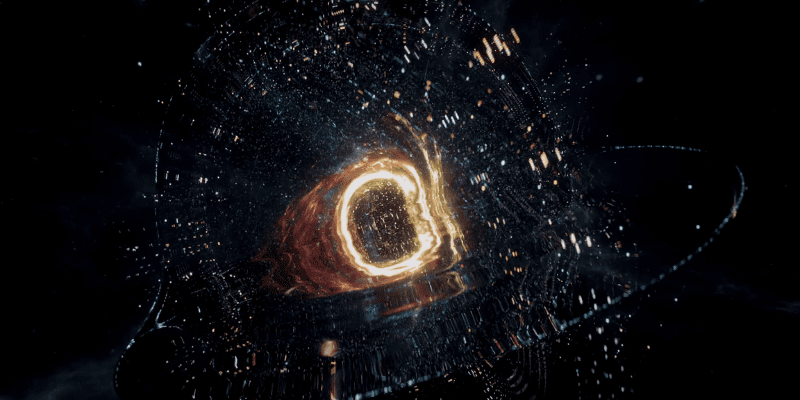
When you grab Artifact Tau after wrenching it out of the Caelumite deposit that’s got it stuck in the rocks, a clearer vision will appear amidst the set of visions you have already been seeing. Take a look.
➡️ More Danger and More Loot
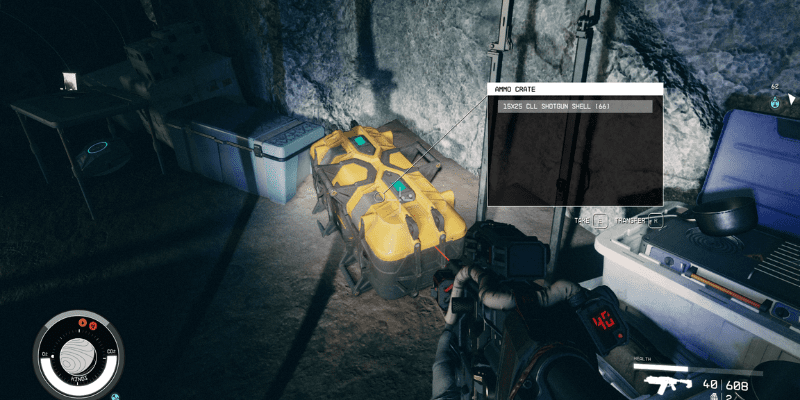
While trying to make your way out of the caverns, you may find another Mk-II turret guarding an area full of some good loot.
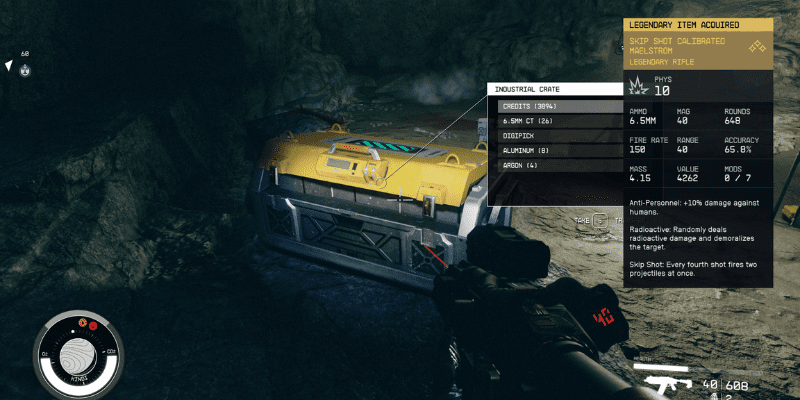
Put the turret out of operation and scan what loot there is. For starters, you would spot a shiny, industrial crate.
Then, there is an ammo crate and a pharmaceutical kit.

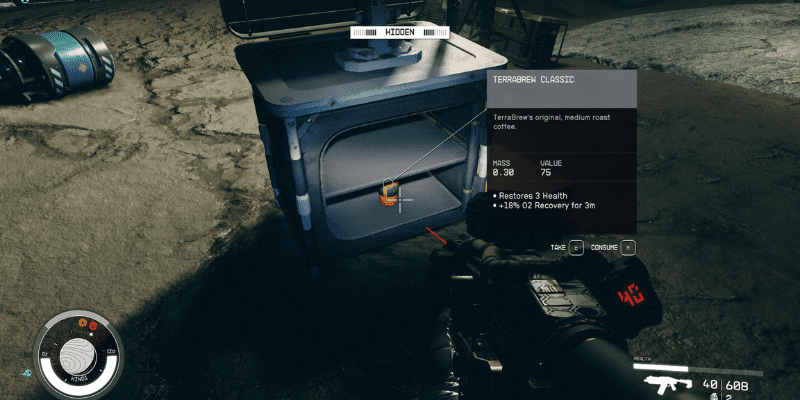
Help yourself to some Alien Stir Fry. Or store it for future use.
There is more food. How about some Synthameat Hamburger and Terrabrew Classic medium roast coffee?
You would also find a Deepseeker Spacesuit. Add that to your collection.
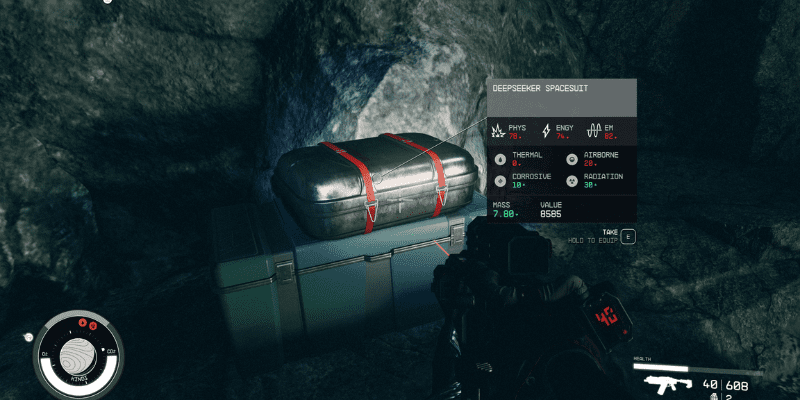
The industrial crate will be loaded with items. I got a Legendary Rifle: The Skip Shot Calibrated Maelstrom.
Don’t worry about where you’re going to put all of this loot, either. We’ve got you covered with our guide on how to get infinite storage in Starfield!
Get Out of The Hillside Cave and Board Your Ship
Step carefully in the darkness, and you will be outside of the Hillside Cave soon. As I expected, there were no hostiles waiting for me when I emerged with the artifact, a vast departure from the time the Shaw Gang caught me when I was getting out with Artifact Chi.

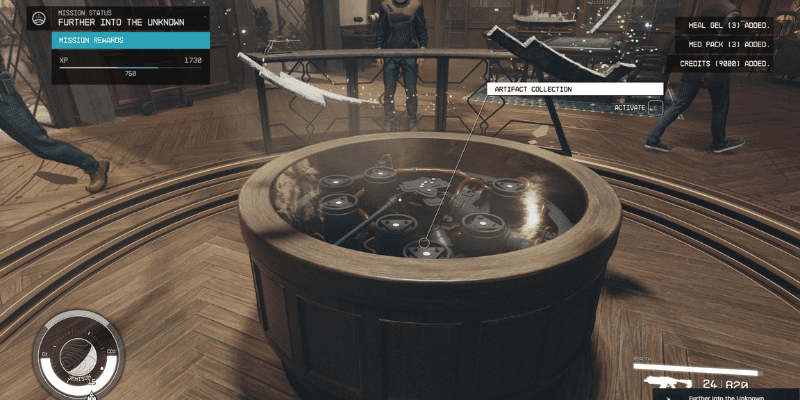
Now, board your ship and get back to The Lodge in New Atlantis. Add both the artifacts to the Collection there. That will conclude Starfield’s ‘Further Into the Unknown’ quest.
Starfield’s Further Into the Unknown Quest: The Rewards
Besides 750XP, you would get 9,000 credits, Heal Gel (3), and Med Pack (3) upon completing the ‘Further Into The Unknown’ quest.
With these rewards, whether you were looking to level up in Starfield or earn money in Starfield, the ‘Further Into The Unknown’ quest has you covered!
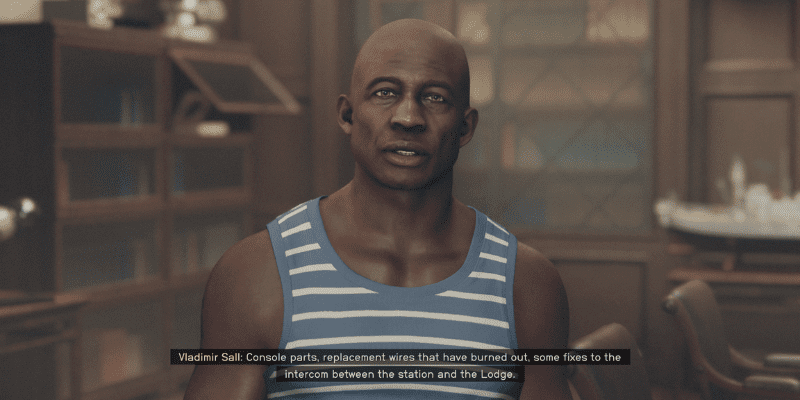
➡️ Vladimir Sall Wants Me to Attend Some Constellation Business
After you have talked with Matteo, who has started to fear what lies ahead on this road the Constellation is going (Noel thinks he might be having a crisis of faith!), you would have to talk to Vladimir. Turns out, he wants you to go up to the Eye, to make some repairs inside the station.
Some of the other Constellation members, like Sarah, Barrett (who we rescued in Back To Vecterra), and Andreja, are already going there. This new mission in Starfield is called ‘Short Sighted‘, which I will cover in my next walkthrough piece.
Wrapping Up
This was the second and final part of the ‘Further Into The Unknown’ quest in Starfield. I got the next artifact, Artifact Tau, but learned next to nothing about the Starborns. Hopefully, the next mission can give me (and you) some answers.
Until then, you can also check out our guide on the Starfield Mantis Quest, which provides you with the Legendary Mantis Spacesuit and the Razorleaf Spaceship!