Wooh! You got a new Nintendo Switch. It is a unique console that offers a hybrid experience: you can use it as a handheld console or hook it up to your TV to play on the big screen!
Playing on the handheld device is intuitive. All you need to do is connect your joy-cons and start playing. However, docking your console to a TV is less user-friendly as this is the first time Nintendo has come with a hybrid console.
And that’s why we’ll cover the exact steps that you’ll need to follow to connect your Nintendo Switch to your TV.
Let’s get started!
Note: Nintendo also released a hand-held-only version known as Nintendo Switch Lite. So, if you’re using one, you cannot connect it to your TV, and this article is not for you!
Benefits of Connecting Nintendo Switch To TV 📺
Nintendo games are a treat to play. If you’re using handheld mode only, you’re limited to 6.2 inches of screen with a resolution of 1280 x 720 for the non-OLED version and 7.0 inches for the OLED version.
However, if you want to use Nintendo on the big TV screen, you get support for 1080p resolution (1920 x 1080) in docked mode. By using the docked mode, you can enjoy the Nintendo games at their full glory.
But what is docked mode? It is the mode where you place to Nintendo Switch on the dock. In return, it transfers the video signal from your Switch to the TV, giving you access to big-screen gameplay!
The benefits include:
➡️ Increase picture quality as it renders at 1080p instead of 720p. If you’re using a 4K TV that supports upscaling, you’ll find the image quality even better.
➡️ Better local multiplayer action as everyone get to experience the game! For example, a TV can multiply the fun if you play a 4-player split-screen Mario Kart. In comparison, local multiplayer through handheld requires you to have 4 Nintendo Switch consoles nearby, and you cannot see your friend’s screen either.
➡️ Another benefit is that you slowly charge your Nintendo Switch and get it ready for handheld mode while continuing your adventure on docked TV mode.
How to Connect Nintendo Switch to the TV
In this section, we’ll follow a step-by-step guide on connecting Nintendo Switch to a TV.
Before you start, ensure you have the following pre-requisite.
- A working Nintendo Switch v2 or OLED (Nintendo Lite won’t work as it is handheld only).
- The Nintendo Switch Dock
- Switch Power Adapter
- A working TV with HDMI input.
- An HDMI cable capable of transmitting 1080p resolution. An HDMI 2.0 cable should work fine! Also, you can check your Nintendo Switch box for the HDMI 2.0 cable (yes, it comes pre-bundled)
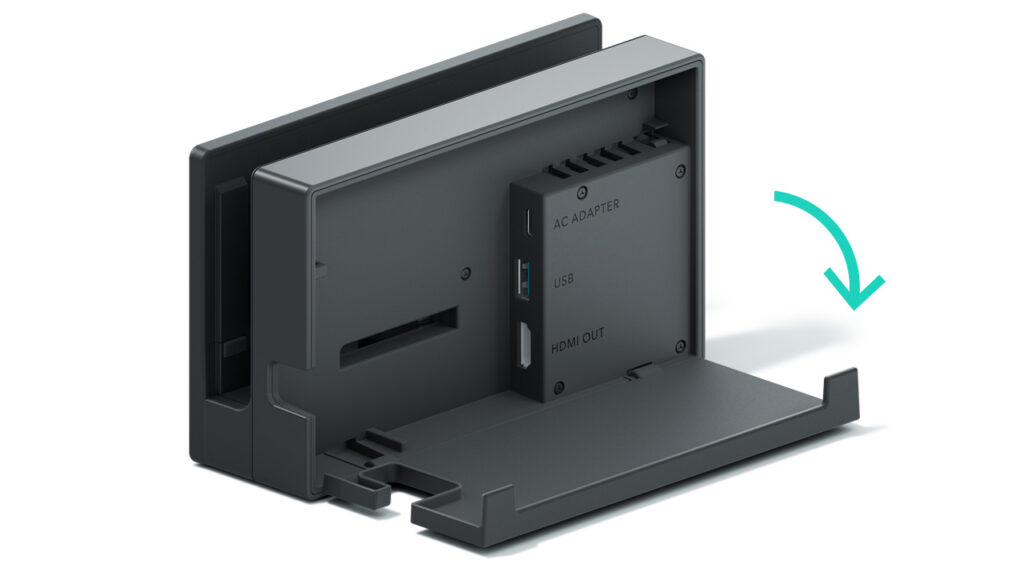
#1. Open the Grey-black Dock back cover
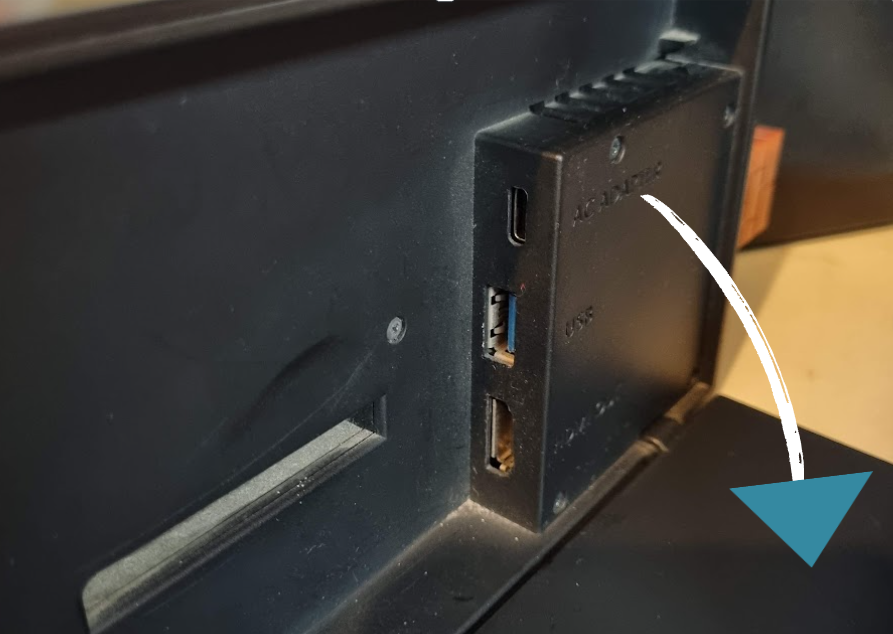
The very first step is to open the grey-black dock’s back cover. It opens up at a 90-degree angle. Once opened, the lid should sit nicely on your desk or table.
That’s how Nintendo shows it on their tutorials.
And this is how it should look like on a live Nintendo Switch.
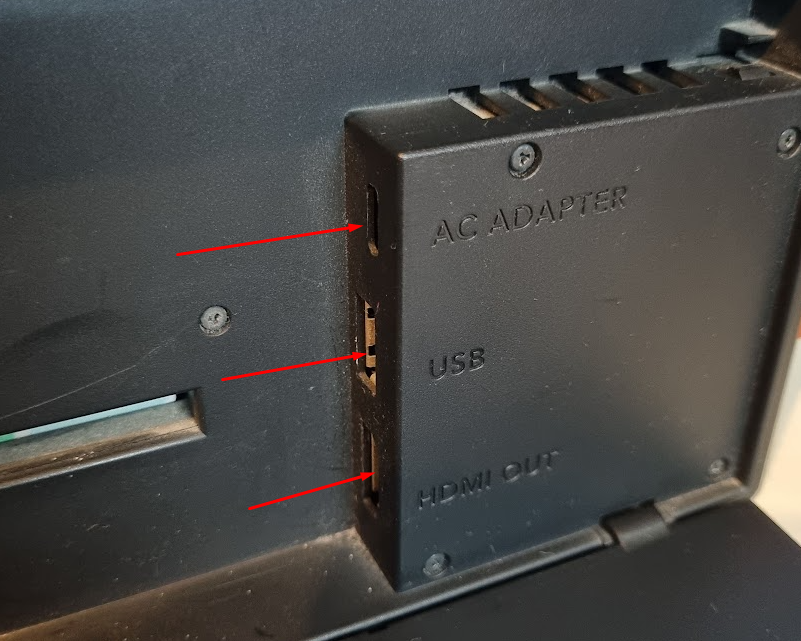
#2. Note the HDMI Out Slot
You’ll need to look closely at the labels at the back of the available port. There’re three ports available there:
- AC Adapter: The adapter where you plug the power in for your Nintendo to work.
- USB: A USB-C port that you can use to plug in different USB-powered devices.
- HDMI OUT: The HDMI OUT port where you’ll need to plug in
It should like as below.
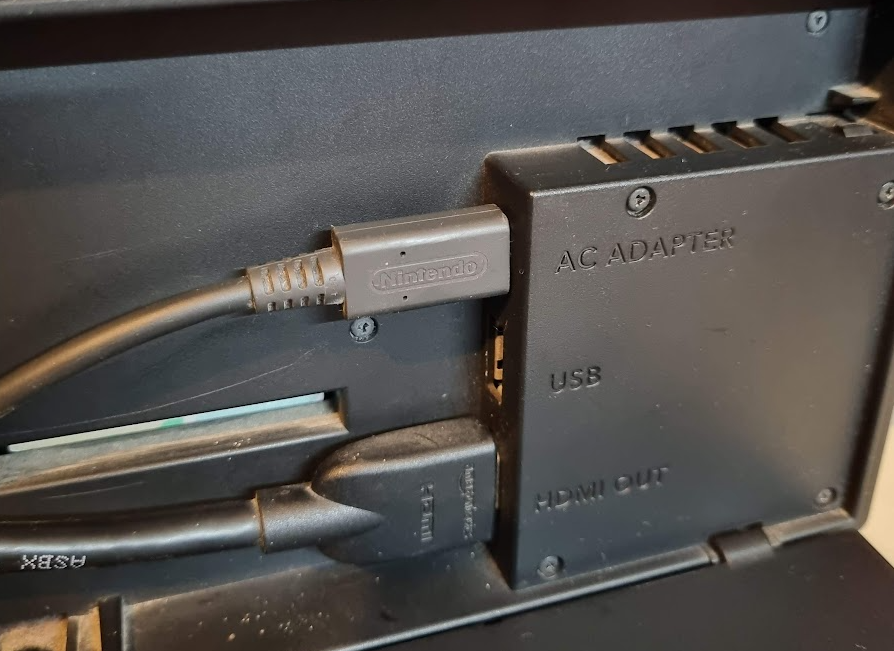
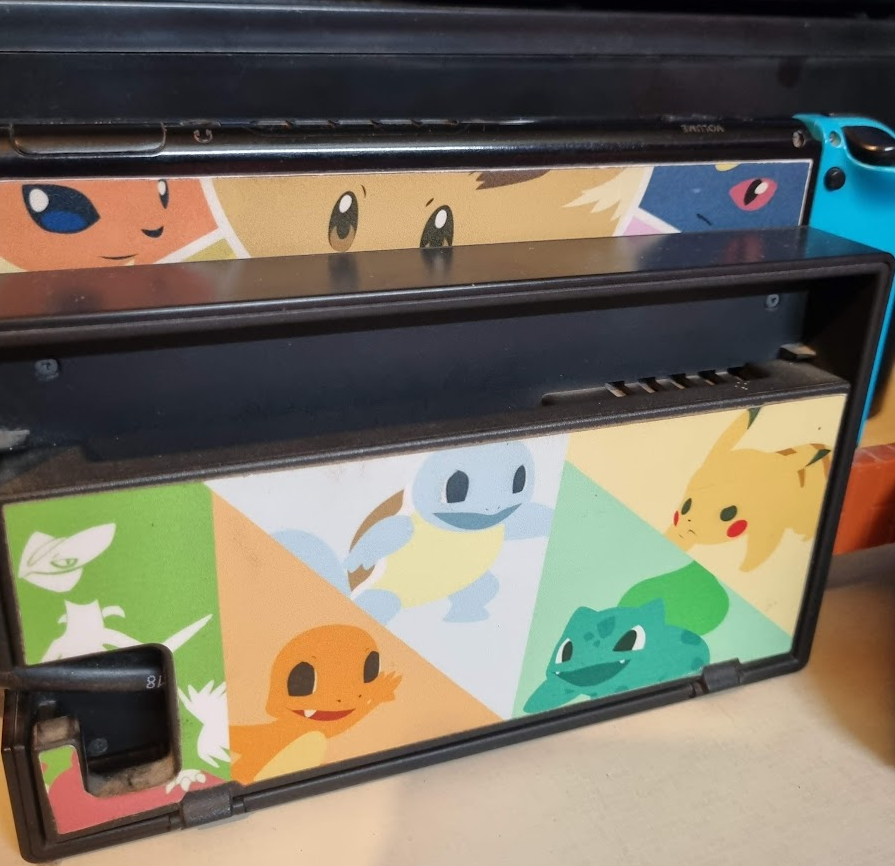
#3. Plug in the HDMI cable in HDMI Out
You’ll now need to plug in the HDMI cable in the HMDI OUT 2.0 port. It’ll only go in one orientation. Also, plug in the power AC adapter.
Once done, it’ll look as below.
Now, close the back cover.
#4. Connect the other side of the HDMI cable to your TV
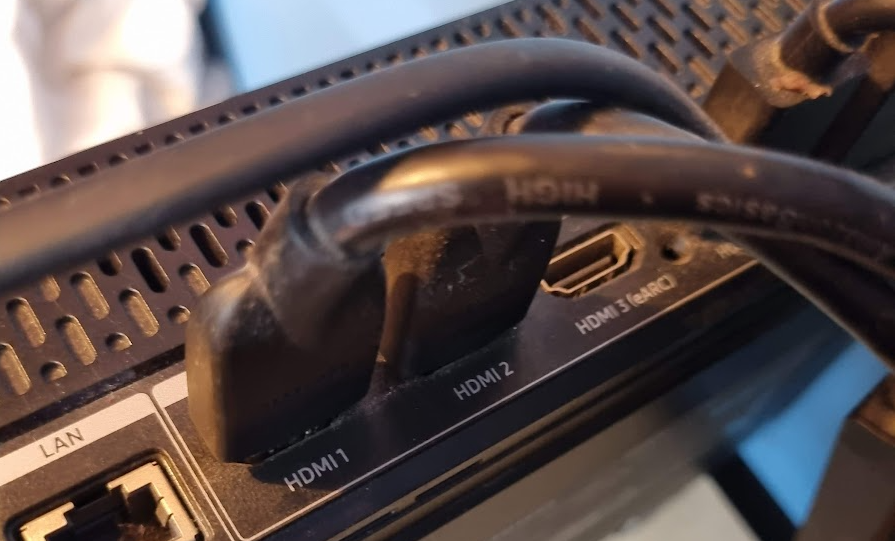
With one side of the HDMI cable in the Nintendo Switch dock, plug in the other HDMI side to your TV.
I’m using Samsung TV Frame 2021 55-inch version. It uses an external doc panel for the input. Your TV may offer a similar solution. If not, the HDMI ports must be on the back of your TV.
It should look as below.
#5. Take out the joy-cons from your console
You must take your left and right joy-cons from your console. Now, put it in your separate Joycon holder.
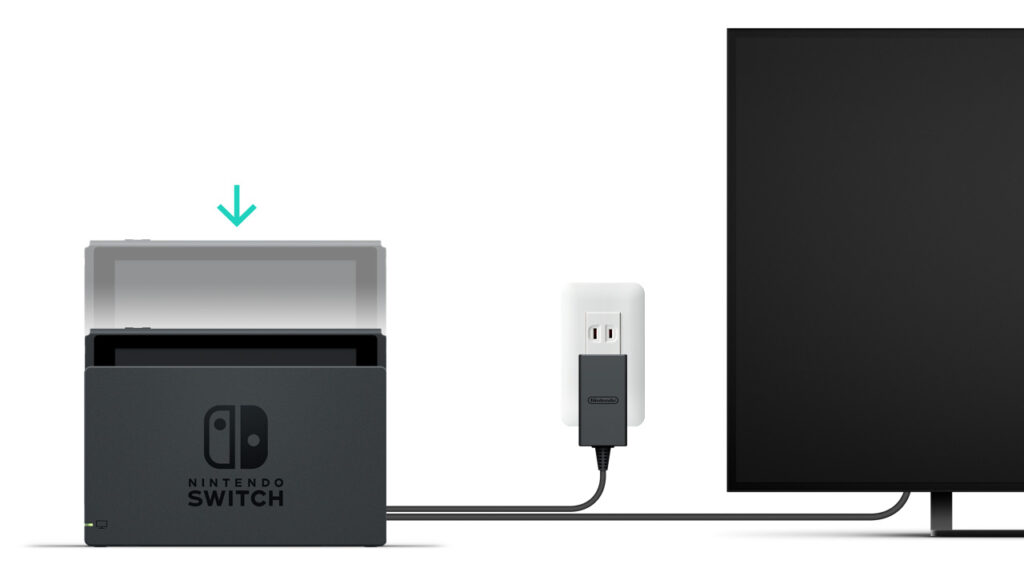
#6. Insert your console into the dock
Now, you must put your console with its screen directed to the dock’s front.
#7. Turn on your TV and switch to the correct HDMI Input
The last step is to turn your TV on with the correct HDMI input. For example, if you plug your Nintendo Switch into HDMI 1, choose HDMI 1 in your TV app. It’ll redirect the signal, and your Nintendo Switch will open.
Troubleshooting 🛠️
Sometimes, you may not get the console signal on your TV. In that case, try the following troubleshooting tips:
- Make sure that the Nintendo power cable is connected and powered on. Reconnect the cable if needed.
- Ensure that the HDMI cable is connected correctly. Try reconnecting them.
- Ensure you have chosen the right HDMI output in your TV interface.
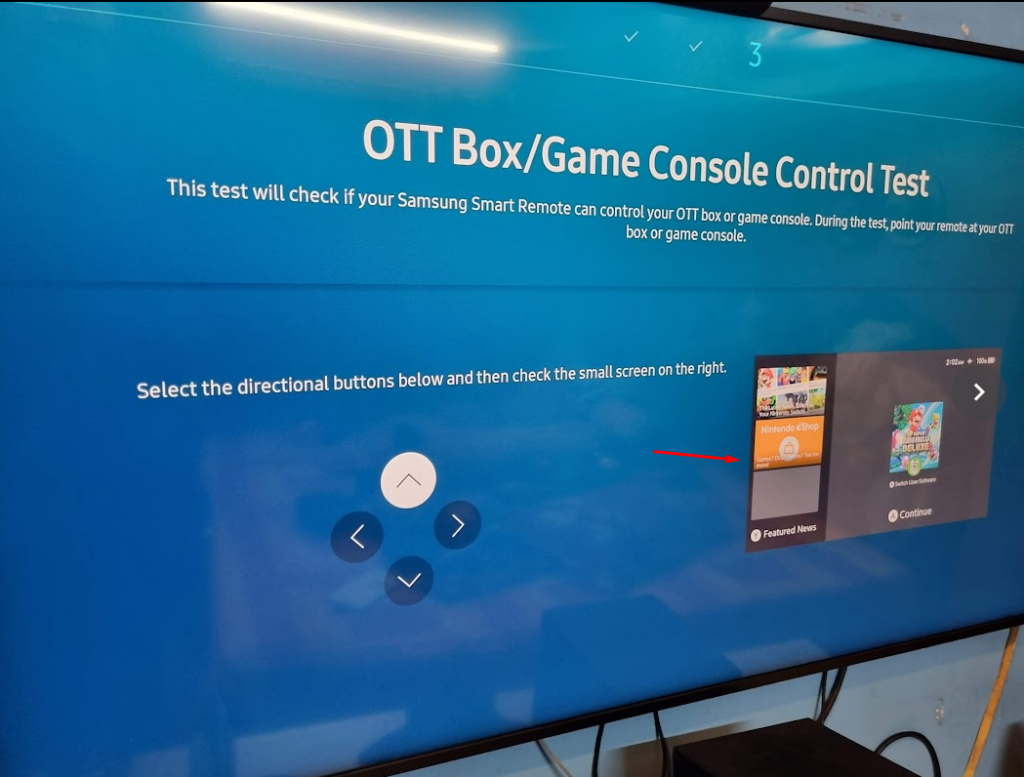
If the Nintendo Switch signal is still not shown on your TV, you should run the troubleshooting available on your TV. In Samsung TV, it is labeled as “Connection Guide.”
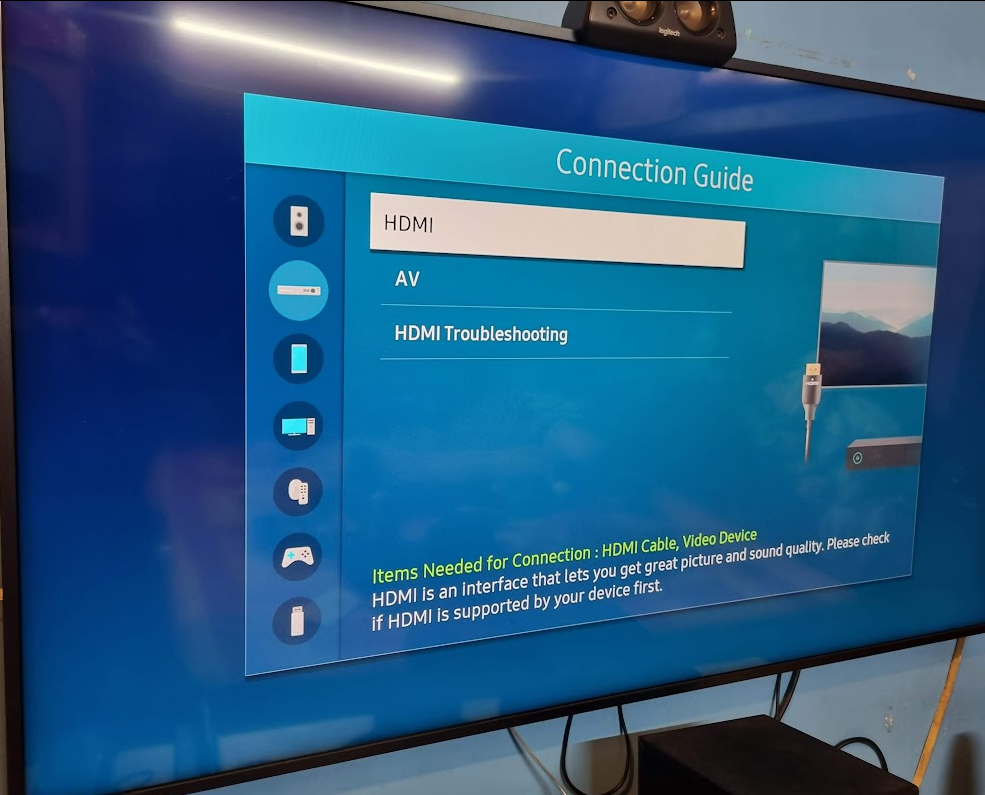
After troubleshooting, it should work as intended.
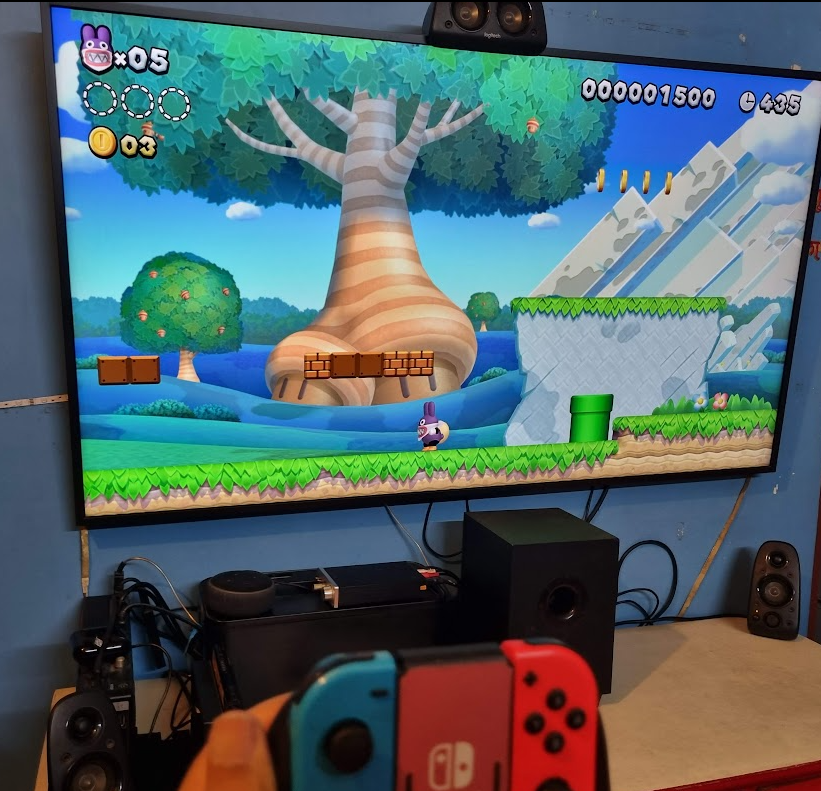
That’s it. You’re now ready to play on your TV!
Conclusion
The Nintendo Switch is a highly versatile console with an excellent collection of gaming titles for everyone to enjoy. By connecting the console to the TV, however, you’re able to expand your gaming experience to include gaming in HD resolutions. Follow the steps shown here, and you should have no issues playing Nintendo’s best games on the big screen.
You can also check out the best Nintendo Switch emulators to play your favorite titles on a PC or your Android smartphone!

