In 2013, the gaming industry saw a gadget that redefined the essence of interactive gaming with the launch of the PS4.
It was a brilliant invention by Sony that charmed millions of gamers worldwide with its exceptional performance and access to the best PS4 exclusive games.
Apart from its cutting-edge technology, people loved that it was easy to use, just like the previous PlayStation releases, maintaining one of the main components of a successful gaming console.
However, not everything is perfect. In this case, the PS4 can sometimes hit you with an error or two – particularly the problem of the PS4 controller not charging or displaying no light.
It can be frustrating, especially when you’re in the middle of your gaming, racing to the finish line, and the controller suddenly stops working because it didn’t charge properly.
While your gaming session might be at a standstill, try to keep your spirits high because there’s a simple fix to it, and that’s what we’ll look at in this post. We’ll go over some of the most effective solutions to help solve this issue.
Common Causes of this Problem
Though facing this issue is very irritating and may seem like the end of the world, it turns out that it’s a common problem every gamer faces occasionally.

Before jumping to the solutions, it’s important to know about the possible causes that might be causing the problem in the first place.
➡️ Faulty Charging Port 🔌
While it may not strike like it, sometimes continuous plugging and unplugging of the charger or the USB cable can weaken the charging port. This can lead to charging issues and is one of the most common causes.
➡️ Low Battery 🪫
Sometimes, due to extensive play, the battery of the PS4 hits critically low, so you may be unable to see the green light that flashes as a sign of charging. Simply put it away for charge and wait till the battery levels are normal.
➡️ Overheating 💥
Though almost unlikely, another possible cause of this problem is prolonged gaming sessions. Extensive usage without putting the PS4 at rest can cause overheating. It’s best to allow the controller to cool down before you plug it in for a charge.
➡️ Wire Issues ⚡
Most people look for the problem in the controller, but in reality, it may be possible that the charging cable has malfunctioned. Sometimes the wire gets worn out or breaks due to mishandling of it.
Using a charging cable that’s not the same configuration can also be a culprit.
➡️ Firmware Issue 🚫
It may also be possible that the controller’s hardware has an issue due to which you cannot charge it or see the display light.
➡️ Console Issue 🕹️
When plugging the controller into the console, the light indicates it’s on charge. If it doesn’t display the light, try plugging it into your computer. If it’s displaying the light this time, there’s possibly a fault in your console.
➡️ Physical Damage 🎮
Mishandling or accidental drops can cause internal damage, which can be responsible for similar problems.
Now that we know what usually causes the PS4 controller not to charge and display no light, let’s learn how to fix it.
Change the Charging Cable
If there’s a problem with your charging cable, try using a new one and see if it works. Remember, you need to make sure you’re using only the official and original PlayStation cable that can be purchased from authorized or trusted sellers like Amazon.
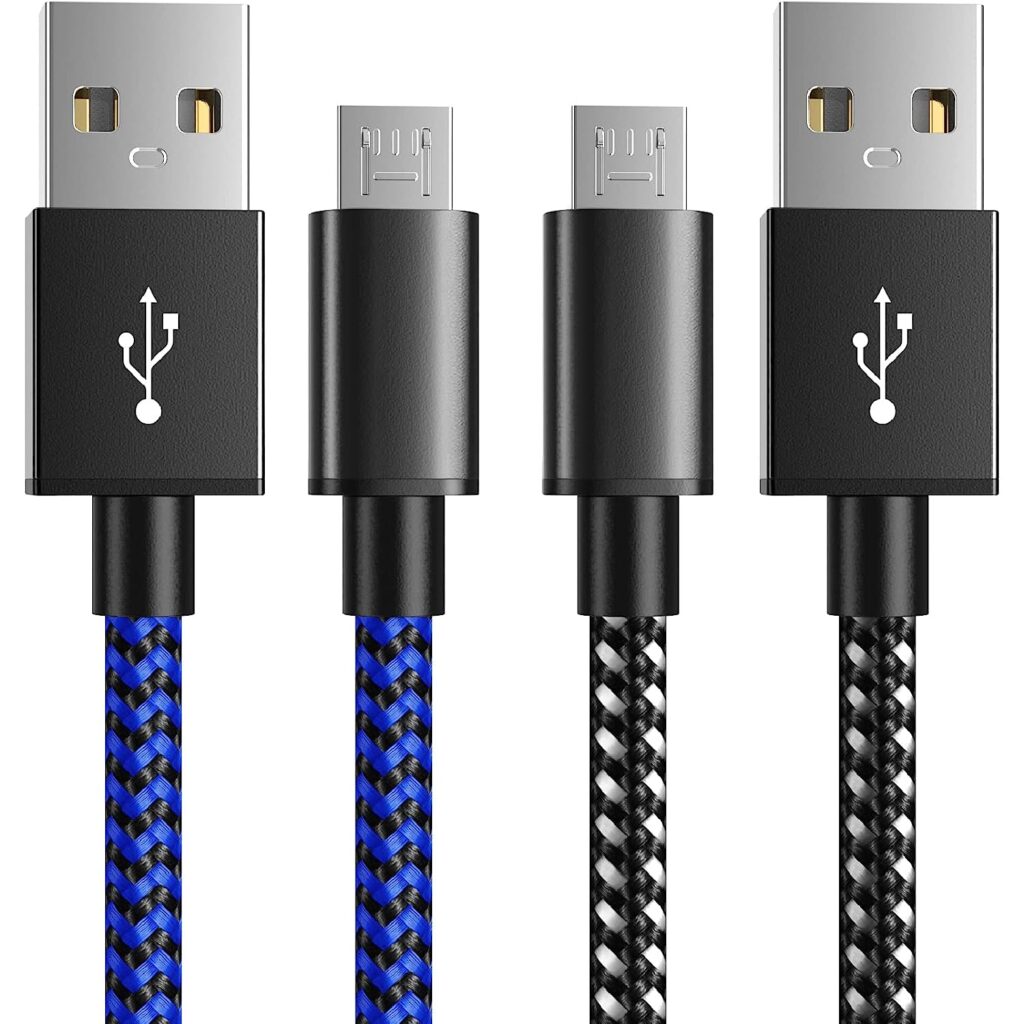
A third-party copy of it is not suitable for charging and may even do more damage to your charging port.
| Preview | Product | Rating | Price | |
|---|---|---|---|---|

|
6amLifestyle PS4 Controller Charger Charging Cable, 2 Pack 10ft Extra Long Micro USB 2.0 Cable,... |
$11.97 |
Buy on Amazon |
Reset Your Controller
Resetting a device to fix the problem is a universal solution, and it surprisingly works most of the time. Follow the steps below, and you’ll be good to go:
- Step 1: Turn off your PS4 and unplug your controller.
- Step 2: Unplug your PS4 as well.
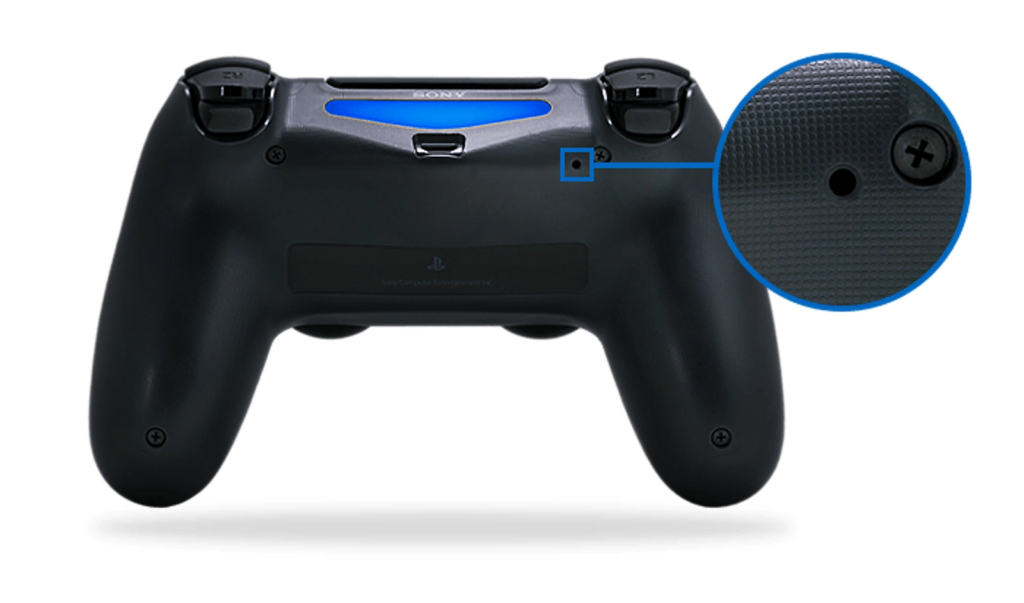
- Step 3: Flip the controller around, and you should see a button on the back side below L2. Use a pin/SIM card ejection tool or a pointy object to press the button inside. Hold it for at least 2-5 seconds.

- Step 4: Plug in your PS4 and controller.
If the light flashes, go ahead and start gaming!
Clean the Charging Port
Sometimes, your charging port stops functioning properly due to dust and foreign particles accumulating. You can inspect it by opening it up. Here are the steps for it:
- Step 1: Disassemble the PS4 controller.
- Step 2: Detect and unscrew the charging port board.
- Step 3: You should see a wire that joins the charging port board and the main board – unplug it.
- Step 4: Check and clean the charging port. If cleaning it is not possible, you can replace it with a new port.
Finally, assemble the controller, and it should start charging.
Pair the Controller Again
You can unpair the controller and pair it again to check if it works.
- Step 1: Turn on your PS4 and go to Settings > Devices > Remove all devices from the list.
- Step 2: Next, switch off your console.
- Step 3: Flip the controller around, and you should see a button on the back side below L2. Use a pin/SIM card ejection tool or a pointy object to press the button inside. Hold it for at least 2-5 seconds.
- Step 4: Turn on your PS4, and connect your controller.
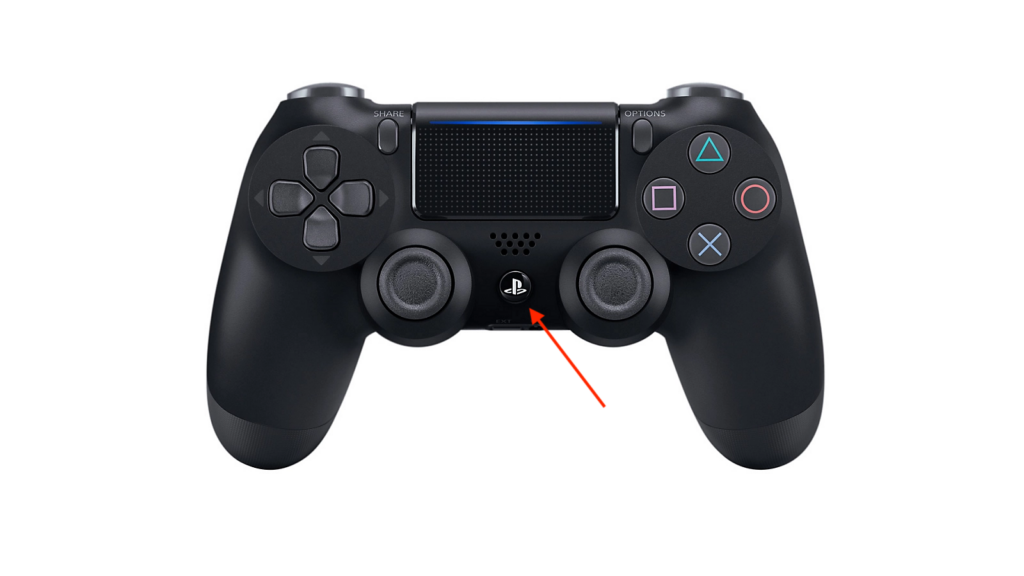
- Step 5: Long press the PS button on your controller, which should turn on the light.
This should help you start using it the same way as before.
Change the Controller Batteries
There’s a possibility your PS4 controller’s battery has become obsolete, so the solution is to change it.
NOTE: This is not an easy method, so if you’re unsure, it’s best to take it to a service center to change your controller batteries by a professional. However, if you’re feeling adventurous, listed below are the steps to change your controller batteries:
- Step 1: Unscrew the controller.
- Step 2: Open the case very carefully. While doing this, ensure you don’t break the ribbon responsible for keeping the case together.
- Step 3: Twist and turn to pull out the battery connector.
- Step 4: Turn the new battery ledge towards the bottom and place the new battery in the controller.
- Step 5: Make sure to attach the connector pin to the socket.
- Step 6: Now, close the controller with the help of screws.
Switch the controller on for the final verdict; you should be ready!
Check for Updates
Remember those annoying times when you’re using your computer and certain functions suddenly stop working? Turns out it needed an update! The same can be the case with your PS4, so it’s best to keep it up-to-date. The steps to do it are quick and easy:
- Step 1: Turn on your PS4.
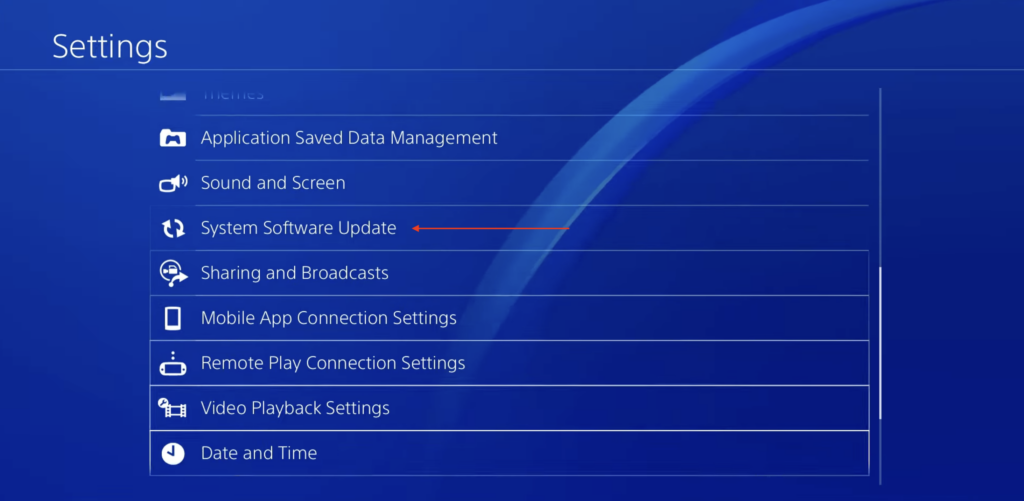
- Step 2: Go to Settings > System Software Update.
- Step 3: If you see the option to Update Now, click on it.
- Step 4: Click on Accept to start installing the update.
Wait for the update to finish before charging and using your controller again.
Closing Thoughts
The above methods to fix the issue of the PS4 controller not charging and displaying light are some of the most effective, so there’s a good chance it’ll solve the problem.
However, if the problem persists, don’t hesitate to contact PlayStation’s customer support team or an experienced professional for help.
You may sometimes also face a network Error CE-32930-7 on PS4. Fortunately for you, we’ve also covered the fixes for the error!