Beastman of Farum Azula is one of the early optional bosses you will meet in Elden Ring. He resides in Groveside Cave in Limgrave and will be your final challenger at the end of the cave.
Groveside Cave is located in the mountain region that lies between the Church of Elleh and Gatefront Ruins. It can be discovered easily if you proceed North from the Church of Elleh.
Before you face off against Beastman of Farum Azula, you will want to clear the Groveside Cave of the wolfpack that’s made a base there. Check out our detailed guide on how to complete Groveside Cave, as it outlines the right strategies you need to take. This guide would be indispensable for beginners to Elden Ring and Soulsborne games in general and would teach you how to take on wolves with a melee weapon. This initial game training is important because you will come up against many wolf packs later on in Elden Ring.
In this tips and strategies article, however, we will direct our focus on how to beat Beastman of Farum Azula, the Groveside Cave boss, who can be a bit intimidating for new players.
How to Reach Beastman of Farum Azula
In order to reach Beastman of Farum Azula in Groveside Cave, you need to take the path that winds to the right after you come out of the first tunnel into the campfire site area. There will be a wolf sitting at the end of the path, staring upwards, with its back to you. This path will join another tunnel that will take you right to the gate shrouded in yellowed mists, which indicates that there is a boss inside. This marks the Beastman of Farum Azula’s location inside Groveside Cave.

Before you get to where the boss is, there is something you need to know that will make the Groveside Cave challenge less of a hassle for you. And that’s not trying to kill all the wolves.
➡️ Killing All The Wolves is Not Mandatory
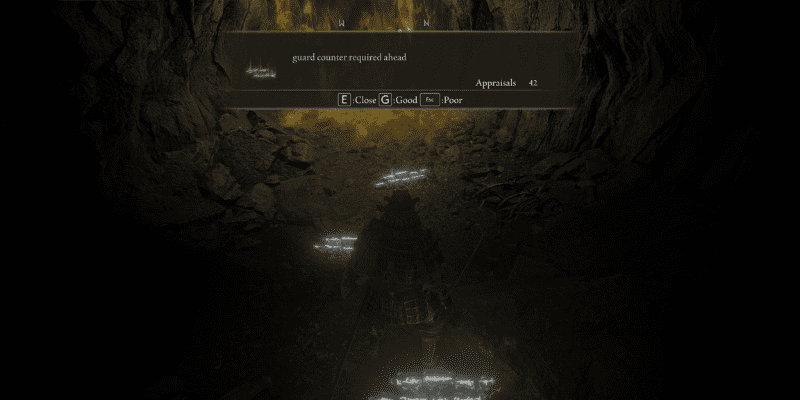
If, suppose, you are already an Elden Ring adept and just want to kill the Beastman of Farum Azula without having to bother with all the wolves inside Groveside Cave, you can do so too. To accomplish this, you would need to go full stealth mode and try not to attract the attention of the six wolves that are in the campfire area. Here we tell you how to do that.
➡️ Killing Two Wolves at the Most
After you emerge from the first tunnel, get in a crouched position while two-handing your primary melee weapon. Then, take the path that winds to the right and slowly reach within the attacking range of the wolf that’s staring up at the dead body of a soldier.
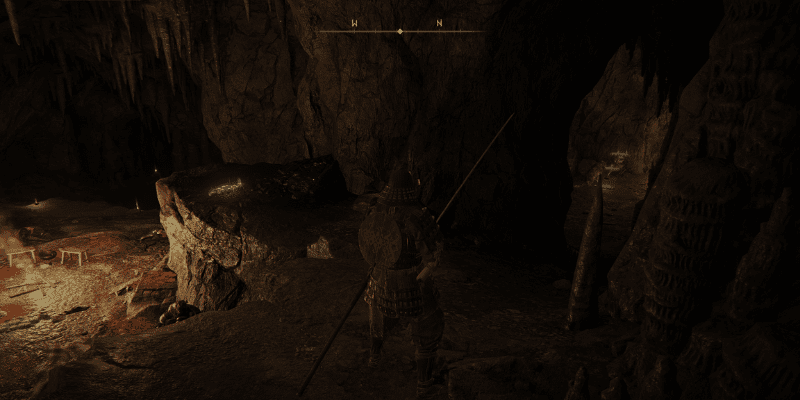
He is kind of guarding the tunnel, but his back would be turned against you, which makes it easier to sneak up on him and finish him off. But chances are he will detect you and turn towards you when you get within killing range. You can’t give him time. Perform a strong attack (Shift+Left Mouse Button) swiftly to kill him.
Now comes a slight problem. One of the wolves is likely to notice that something is off and would come to investigate. Do not go ahead to meet him. Instead, crouch and retreat further into the tunnel and make him come to you. We are doing this so that we can separate this one from the pack and take care of him without attracting the wrath of the other wolves. After all, you never wanted to deal with the wolves, didn’t you?
Make him come towards you and kill him by attacking from a crouched position. If you have been careful till now, you won’t need to kill any other wolf. Now, get to the misty door.
How to Prepare for the Fight
Before you traverse the mists, keep your health potion (Flask of Crimson Tears) at the ready (the button R shortcut). If you have around four charges of this flask, it is good, but three charges are also doable. We are going to try and take the Beastman of Farum Azula down with a melee weapon, not a magic one.
If you got the Lone Wolf Ashes from Ranni the Witch before, then you can use it to summon three spectral wolves to aid you in the fight. But that depends on your playstyle.
If you have upgraded your primary weapon using a smithing stone twice, then it will be highly useful against the Beastman. If not, then it is going to take you longer to kill him.
Your Vigor needs to have some upgrade at least before Groveside Cave, as leveling up this attribute enhances your HP (Health Points).
Replenish your health if it is down; make sure you are not carrying too much weight as it slows down your dodge rolls. Then, two-hand your weapon.
Now we are ready. Go through the mists.
How to Defeat Beastman of Farum Azula: Tips & Tricks
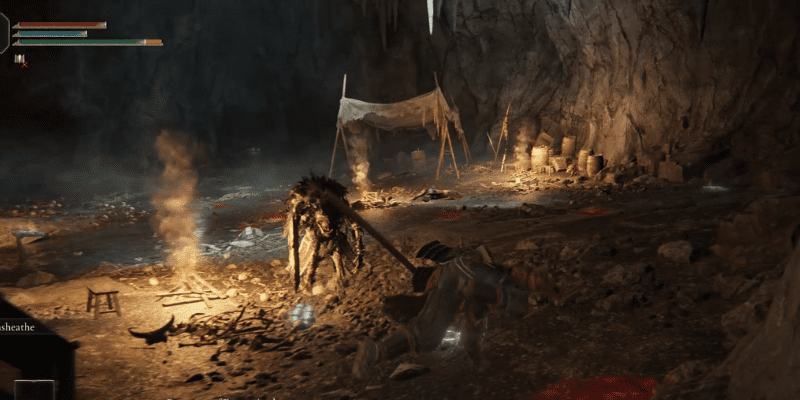
You will enter a wide, open area after you pass through the enchanted door, which is similar to the boss area of Soldier of Godrick in Stranded Graveyard. As soon as you enter, the Beastman of Farum Azula will come rushing toward you. Well, what else could anyone expect? That’s the kind of hospitality the Tarnished is going to get. So, are you ready for tips on how to beat Beastman of Farum Azula? We are.
➡️ Get Away From the Misty Entrance Area ASAP
First, lock on him and try to move to the right side of the entrance. We are doing this so that Beastman of Farum Azula is not able to trap you near the entrance. This will also get you in a spot where there is plenty of space to move around. If you are already an Elden Ring melee combat expert, you will dodge roll in the front when he comes near, but it’s best to get away from the misty entrance area as soon as possible.
➡️ Watch Out For the Lunge Attack And Then Close The Gap
The Beastman of Farum Azula will lift up his weapon — a monster’s version of a large meat cleaver — with his right hand, and while it looks like he will run holding it towards you, it won’t be the case. He will lunge, and you better watch out for the reach of his weapon, as it can be deep. Evade the lunge and be ready for a wide, arcing swipe attack that comes next. Evade that too; this marks the end of his first attack combo, which is a two-hit one.
Now, try attacking him two-handed with a jump or roll toward him to slash once. Once you end the blow, dodge roll back, and keep the distance.

➡️ Evade Beastman’s ‘Savage Six’ Attack
‘Savage Six’ is a term we coined for his six-hit attack where he slashes four times in wide arcs, then brings his cleaver/sword very fast from down to up, the momentum lifting him in the air, and the last, sixth slash is a heavy blow that comes from the top.
Your best option when this flurry of attack starts is to stay out of range and evade, but if you are unable to, try to dodge roll to the side and not to the back. If you want to try hurting him, slash him from the side and move away. If you cannot jab with your weapon without getting hurt, wait for the ‘Savage Six’ blows to end and then move in for the attack. Then jump back again.
➡️ More Lunges
The Beastman of Farum Azula will try to lunge again in three-hit attacks, so be prepared and land a blow upon spotting an opening. There is also one attack move when he lifts up his weapon horizontally with both hands and slams it downwards in front of him. Watch out for this one too.
➡️ Time to Rejoice When He Howls
At some point in the battle, the Beastman of Farum Azula will howl. This is when he is vulnerable. When you see him howling, move in immediately to land a blow. While howling, he won’t be using his weapon, so he can’t hurt you. Grab a hold of this opportunity.
➡️ Avoid Using Shield
We are attacking him two-handed and are not going for the shield because the multiple swipes that he makes in quick succession could unbalance you. These swiping attacks can really hurt if you are not fast enough to tackle them. If you are really fast with a guard counter, use a shield. Otherwise, just try to stay out of range of his attacks with dodge rolls and jumps.
➡️ Try Not To Run Around
Running around without the Beastman of Farum Azula in your front could make you blind to where his weapon is going to land next. Since he is chasing you, you won’t be able to anticipate his attacks. So, do not engage him without locking on to him.
We want you to evade his slashes when you can see them coming, and not run away from him. With a bow, however, running around and turning back to shoot might work.
➡️ Learn the Attack Patterns
Beastman of Farum Azula will keep repeating these attack patterns. If you miss hitting him, no issues. Just wait for your next opportunity. Keep hurting him, and he will be dead soon. He does not have a great health pool, so 6-7 well-timed hits while two-handing your weapon will bring him down.
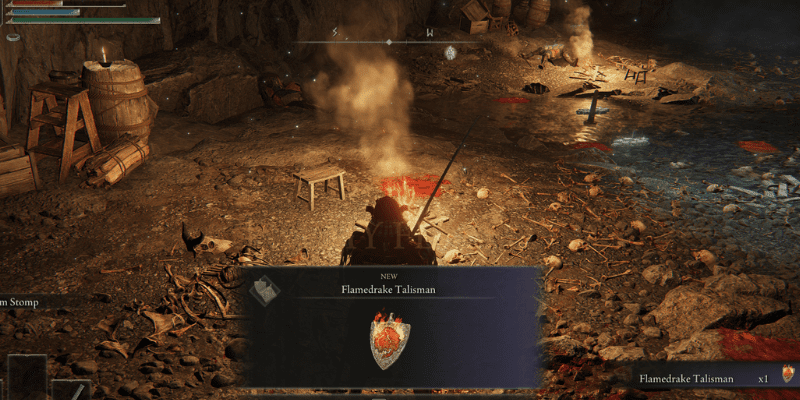
Beastman of Farum Azula Item
When Beastman dies, he will drop the Flamedrake Talisman. It is a useful Talisman and boosts fire damage negation upon being worn. You can equip it from the inventory.
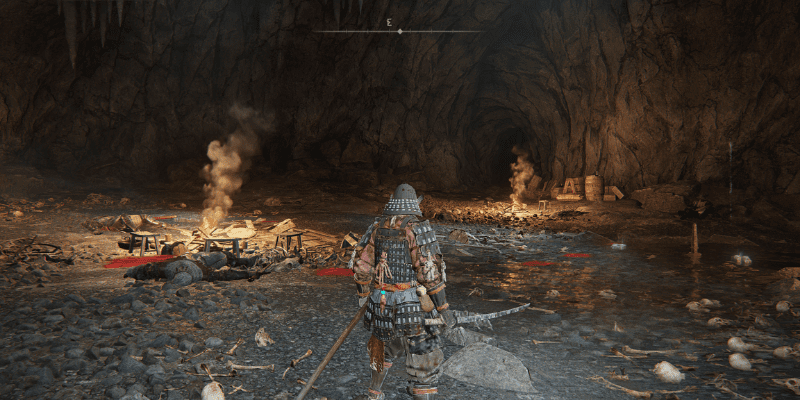
Look around the fight area, and you will see two bright tendrils of light entwined together in one place. Using them, you can teleport back to the entrance of Groveside Cave.
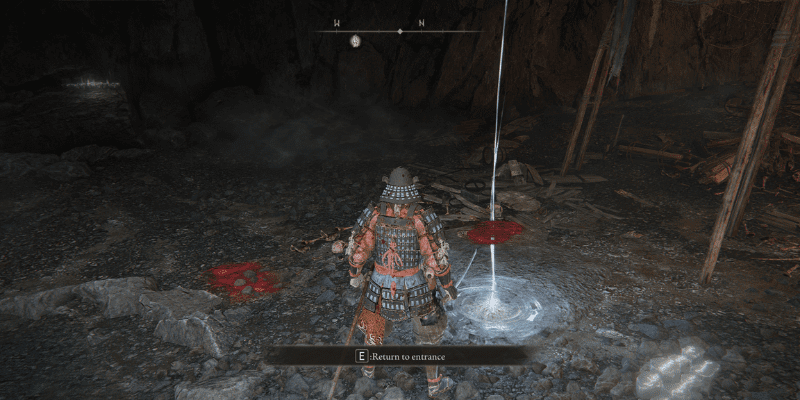
That’s it. You have now successfully completed the Groveside Cave.
Wrapping up
Beastman of Farum Azula is a very early game boss in Elden Ring whom beginners should pay attention to. His health bar may not be up to a conventional Elden Ring boss’s mark, but you will find his attacks difficult to get out of. Since he moves fast and is relentless when he unleashes the six-hit attack, he is really good training for newcomers to Elden Ring.
After beating Beastman of Farum Azula, you will get the Flamedrake Talisman. But do you know how to use a Talisman pouch? If not, check out our guide on how to use a Talisman Pouch in Elden Ring. The guide also tells you where you can find more Talisman pouches in the Lands Between!