Elden Ring has many underground locations, and Groveside Cave is one of the first you can chance upon when exploring Limgrave, as it lies close to the Church of Elleh. Inside Groveside Cave, you will find a Site of Grace, some enemies, loot, and a final boss with the name of Beastman of Farum Azula.
In this Elden Ring guide, we will give you a detailed breakdown of what approach to take and strategies to adopt inside Groveside Cave. But first, let us explain why you should not skip this cave and help you with its location.
Why Exploring Groveside Cave is Important
The Groveside Cave is an optional cave but one you should definitely explore if you are a beginner to Elden Ring. You will learn some useful fighting skills here against animals and face a boss that can be really deadly to beginners.
Some might opine that more challenging bosses and animals can always be found later, and players can skip the Groveside Cave. These are sound arguments, but for those who have been playing Soulsborne games for quite some time.
In our opinion, you should not give Groveside Cave a miss if you are an absolute beginner. You will learn something about combat styles in an underground area. And, most probably, it will be the first time you will be facing wolves in Elden Ring. Hence, there are some learnings ahead that you should not say no to.
Location
Groveside Cave is located in Limgrave, towards the North of the Church of Elleh, the cave entrance being marked by a fire spit.
To find the Groveside Cave entrance quickly, just sneak past the Godrick soldiers patrolling the forested area that lies between the Church of Elleh and Gatefront Ruins. You have to go North West.
Once you near the cliffs, you will see a soldier sitting some distance from the wall of the mountainside, beside a fire.
The mouth of the cave lies close by. Since you have come close to the mountainside, it will be easy to find, especially since there is a fire spit to the left of the cave entrance. The spit has some wood smoldering in a container that hangs from a makeshift tripod assembled with wooden staffs.
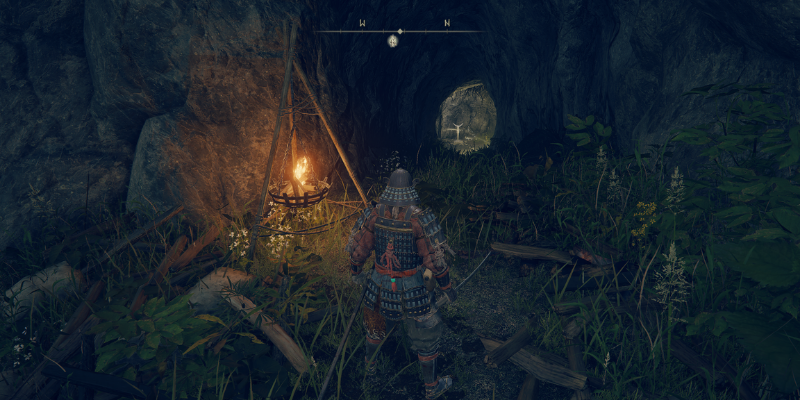
To be on the safe side, we suggest that you first finish the resting soldier off with a quick backstabbing charged attack and then decide to enter the cave. It is not necessary to kill him; you can even sneak past him. It is up to you.
Go inside the cave towards the Site of Grace. There will be no enemies at this point in the game, and you do not need to crouch. We chose caution nevertheless as we didn’t know what to expect.
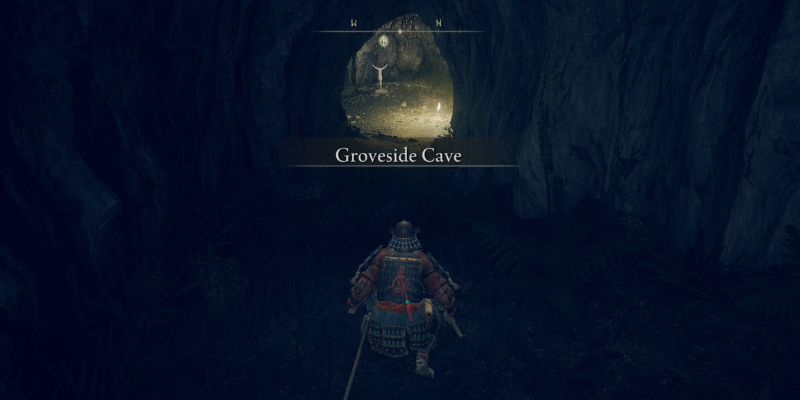
Now that you have located the Groveside Cave entrance, you should go in and touch the Lost Site of Grace, illuminating the open area inside the cave.

A torch is not necessarily needed inside the cave, but it can be helpful in moving more slowly and cautiously along the paths.
Groveside Cave Enemies
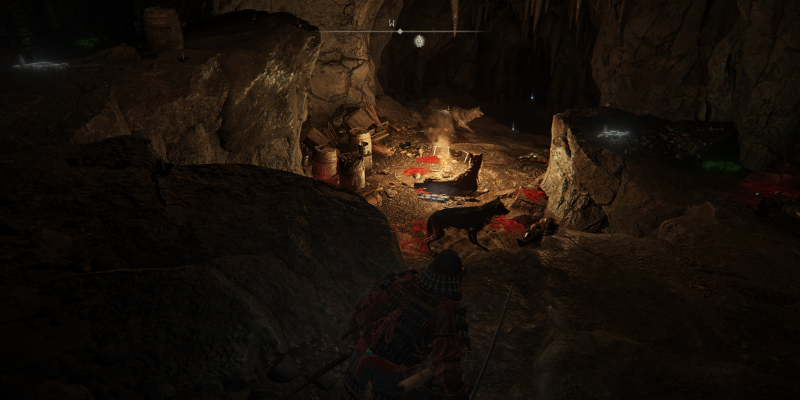
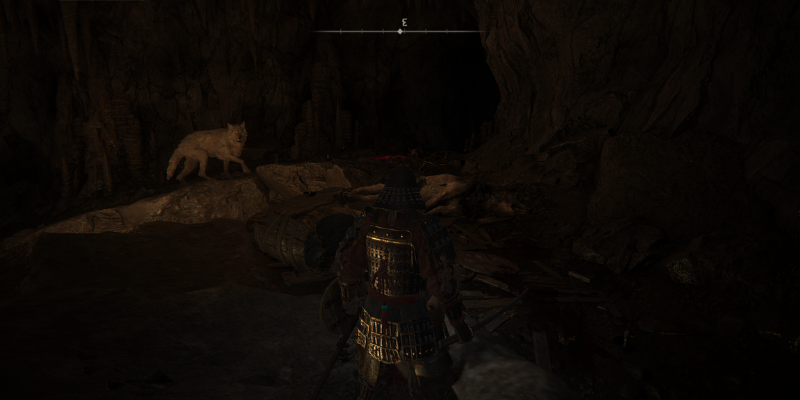
The inside region of Groveside Cave opens out into a small area where a campfire is burning, with a wolf pack nearby. Some soldiers are lying dead nearby. From the looks of it, the wolves wrested control of the area by killing all the soldiers.
Before you spot the dead bodies, you will spot the wolves, the blaze clearly putting them in the center of your attention. Don’t try to find the dead soldiers first because that would mean getting closer to the edge of the ledge and the wolves sensing your presence.
Wolves are the only enemies you will find in Groveside Cave, apart from the cave boss Beastman of Farum Azula, who comes later. But first, you need to learn how to kill the wolves, as they will surely be able to take you down if several of them attack at the same time. Here are the steps we found useful.
Luring The Wolves For A One-On-One Fight
Go on ahead for a bit on the ledge after the path from the Site of Grace opens up to the campfire site but do not drop down to the main area. The path will bifurcate; one becomes part of a ledge that goes straight down, and one goes towards the right. We are skipping the latter for now.
Move slowly ahead on the ledge area path that goes down straight but don’t enter the campfire area. Just let one of the wolves sense you; three low barks, one after the other, will signal this.
Once you hear them, quickly backtrack up, towards the right of the opening you just came through and go to the corner of the wall. Now you have your back against a wall, and no wolf can attack from behind.
You two-hand your weapon then and wait for them to come to you.
How to Kill the Campfire Site Wolves
There will be four of them roaming or sitting in the campfire area, and you need to take care of them first. Yes, there are three more wolves, but they are further away from the campfire area. Here are the most important tips that will help you make short work of the wolves:
➡️ No Rushing
Do not rush in to kill them, thinking that you have got armor and they have none. You will get mauled to death within seconds if they surround you. Each one will lunge at you so quickly and repeatedly that before you know it, you will not be even able to escape from where they have got you encircled; forget about trying to kill all of them. You don’t want to be in the midst of the pack when fighting them. So, don’t rush; drop to a crouch and first try to see how many of them there are. Two will be easily visible, and since we have done the hard work, there will be two more.
You just need to go slowly on the downward-sloping path that leads straight. This action will bring you to their notice. Now quickly run back up. As we mentioned earlier in the article, you will hear them barking thrice.
➡️ Make Sure the Wolves Can’t Attack from Behind
To tackle the four wolves, the next step you need to take is to turn right from the sloped path and make it for the wider area of Groveside Cave that ends in a wall. You have to secure yourself in that area, with the wall to your back, and then engage the wolves. The wolves can’t jump up directly to your location, and they would be forced to take the path upward that you just took. They can’t surround you now.
They will come, one by one, and that is the best way to deal with them and kill the whole pack eventually. Lock on to the oncoming wolf, and use your melee weapon just when it is about to pounce on you, not a second early, not a second late, and the slash will kill its jump in mid-air, rendering the attack ineffective. Then go quickly for another. And another, if needed.
If timed well, 2-3 quick slashes will kill a wolf. They are just fast; they are not that hard to kill. There would be the leader of the pack there who would take more hits to be killed. Watch out for their evasive side jumps because they can be really fast.

If you don’t time your attack well, the wolf will be able to maul you a bit with 2-3 slashes in quick succession. Don’t let it happen often, or else your health pool will be drained soon, and you will die.
How to Kill the Other Three Wolves
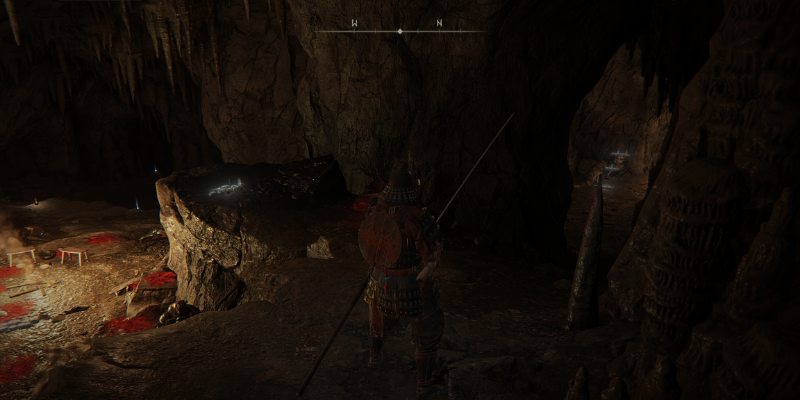
Once you take care of the campfire site wolves, go in crouch mode and slowly make your way toward the pool in front of you. We didn’t use a torch here, and we wouldn’t recommend you use one either.
- Strain your eyes a bit, and to the left, you will see a wolf resting on the low ground. You are on a bit higher ground and far from him; that’s why it is not able to sense you. There is another wolf to the right, just across the pool.
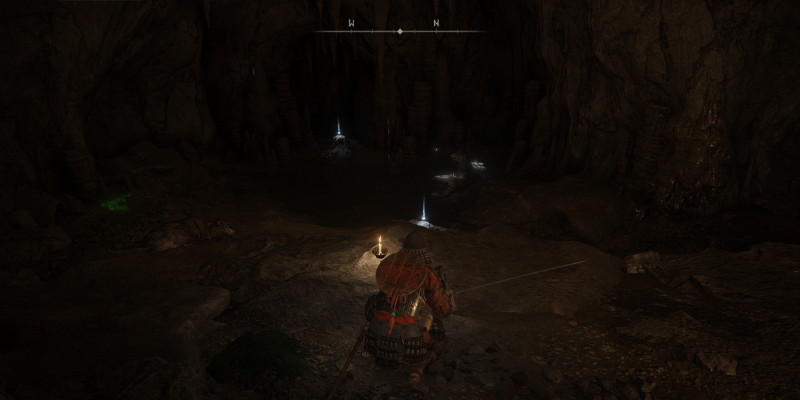
- Kill the left one first with a power attack. Creep on him, hold down Shift, and then press the Left Mouse Button for a charged heavy attack that will kill him instantly.
- But killing it would give you away to its buddy, who will try to spring on you. It is just one wolf here, so you don’t need to worry a lot. Kill him too.
- Now there is just one wolf left, and he is on the path that winds toward the right of the campfire area entrance. We suggest that you stay in crouched mode and sneak on him.
- Using a charged attack on this third wolf would be easier if you came up on him from the path that winded right from the campfire area tunnel entrance. If you can do so without letting him get suspicious, do it, as this strategy would bring you to the wolf with his back turned to you. In crouch mode, do a charged attack by holding down Shift and clicking the Left Mouse Button. He will be dead before he knows it.
Items in Groveside Cave
Now that all the seven wolves inside Groveside Cave are accounted for, you can focus on getting some loot before dueling with Beastman of Farum Azula.
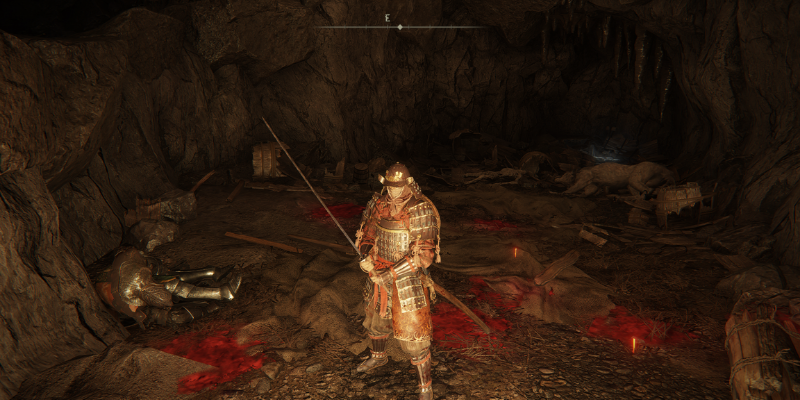
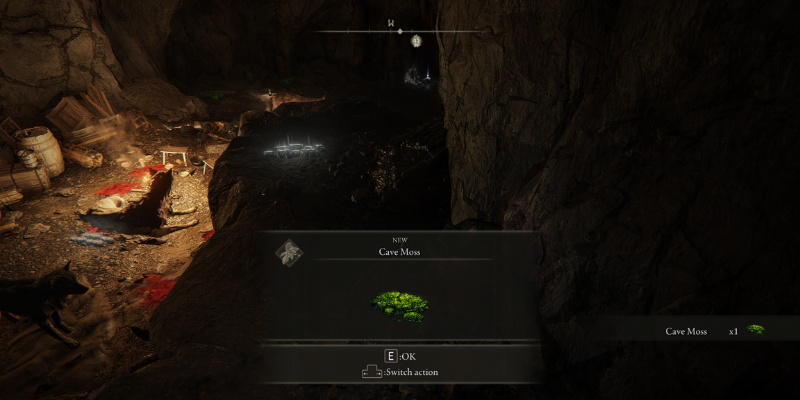
Inside Groveside Cave, you will find plenty of Cave Moss. In the campfire area, you will find a Cracked Pot. Inside the pool, towards the right, just where one of the wolves sat, you will get plenty of Silver Firefly. You will also get a Golden Rune and Glowstones inside the cave.
Final Words
The Groveside Cave offers some excellent challenges and items to an Elden Ring beginner. While it may take some planning and plotting to kill the wolves inside the cave, this is good practice before players come up against the final boss of the Groveside Cave.
If you are struggling with the game, here are our Elden Ring beginner tips that should help you find steadier ground in FromSoftware’s magnum opus.